


NOTE: This is a throwback of an E-Book I wrote in 2011. I miss the good old mining days lol.
This guide has been featured on: bitcoinminer.com, bitcoinwatch.com, bitcoinnews.com, bitcoinlinuxguide.info, bitcoinjobs.com, coineer.com and more.
Bitcoin Mining Pro E-Book (Full Version)
In this E-Book, I am going to share my project in creating a Bitcoin mining cluster, which I started in June 2011. I will try to include everything from beginning to the end with as much detail as possible. Most of this project was trial and error, so I will do my best to note each step of the way with all the pros and cons. I would beleive this to the most complete guide currently available for helping people understand the basics of Bitcoin mining, and actually being able to delve into it as well. Please keep in mind that my Bitcoin operation is completely handled under Linux operating systems, however I do have a few Windows based Bitcoin miners so I will provide notes, guides, and best practices for that OS as well. Also note that many of the references that I make in this E-Book are in regard to my personal Bitcoin mining rigs.
If you do not know what Bitcoin is, I highly suggest you read up on the following sites:
- http://www.weusecoins.com/
- https://en.bitcoin.it/wiki/FAQ
- http://gizmodo.com/5803124/what-is-bitcoin
- http://en.wikipedia.org/wiki/Bitcoin
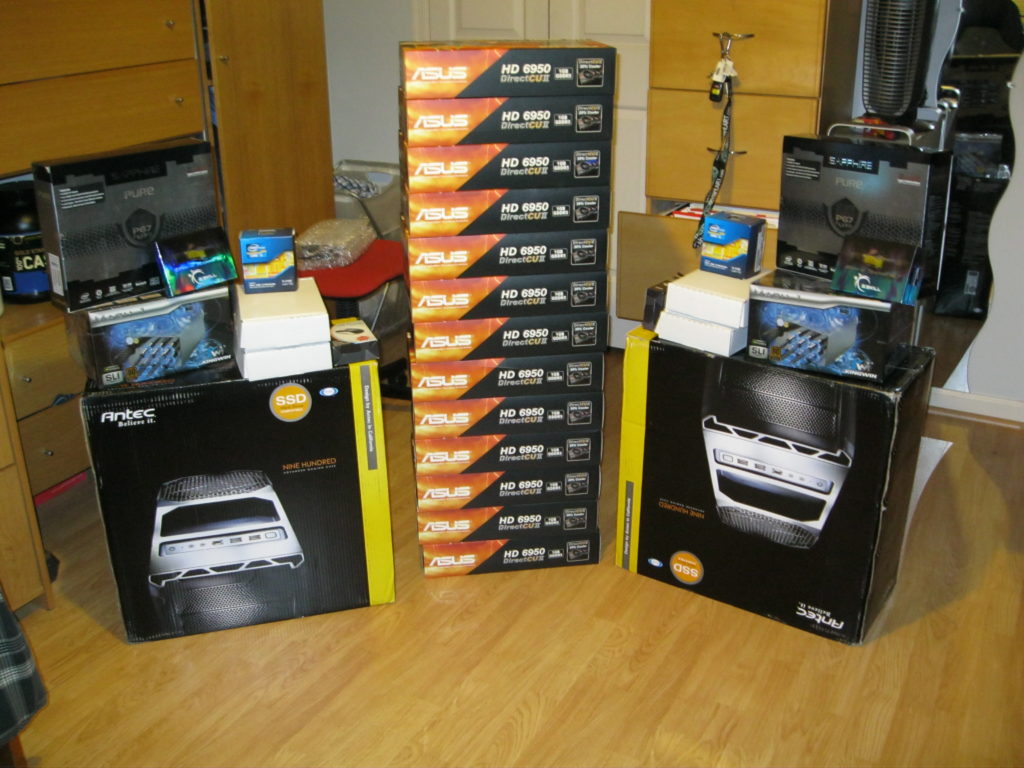
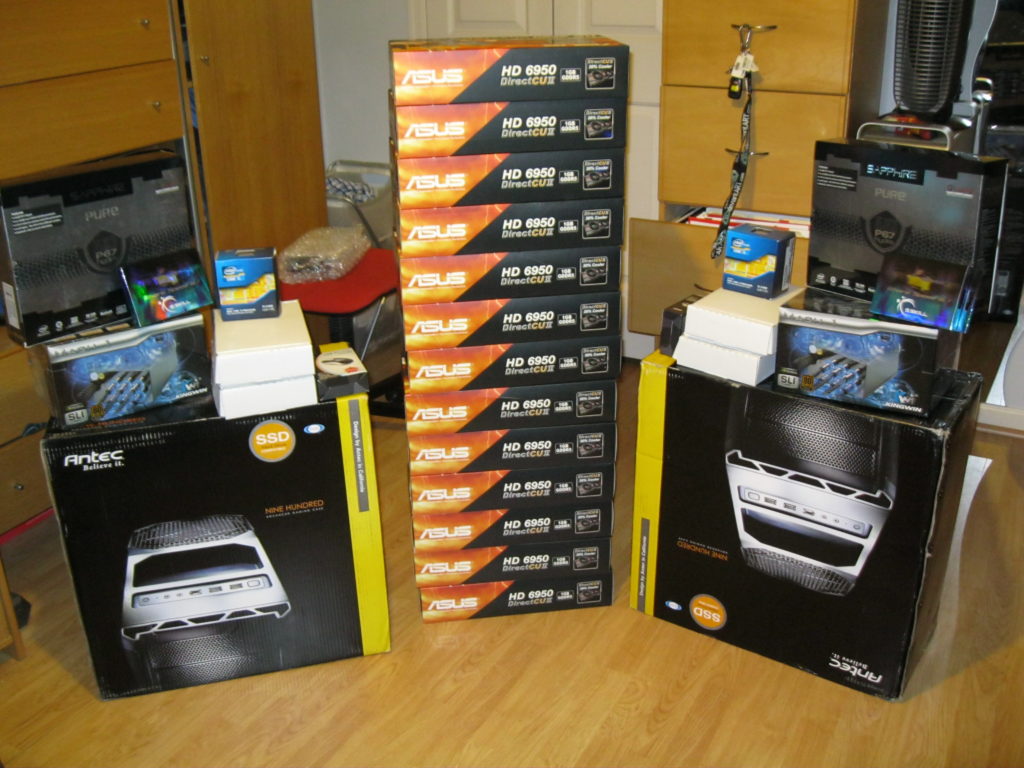
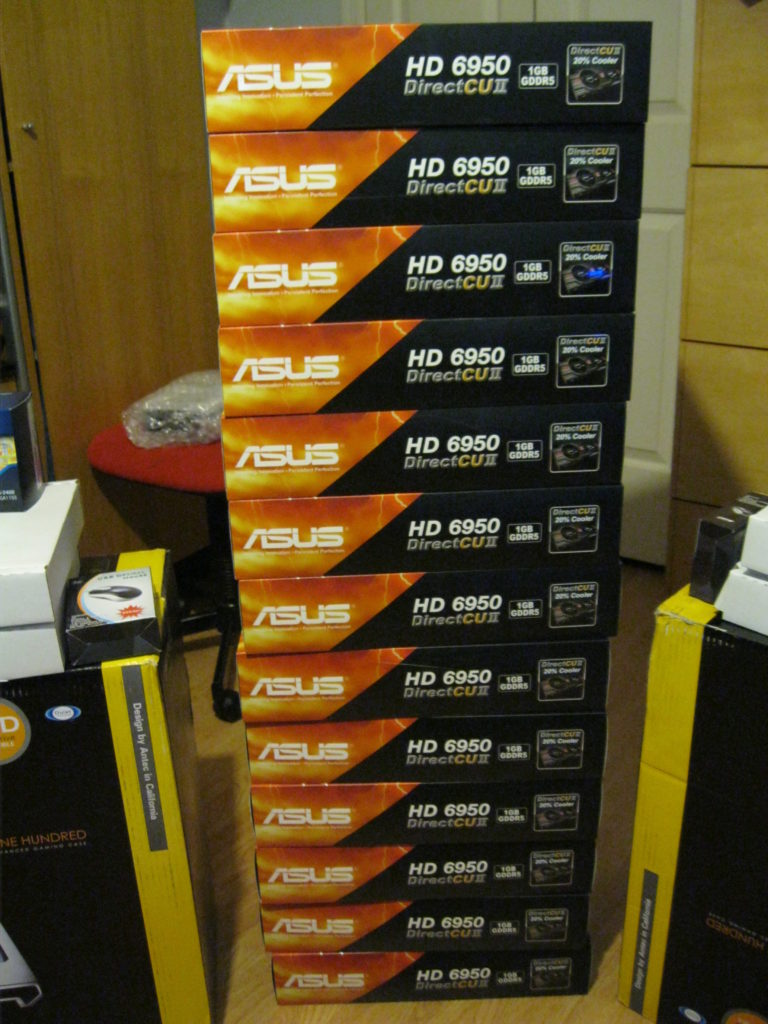
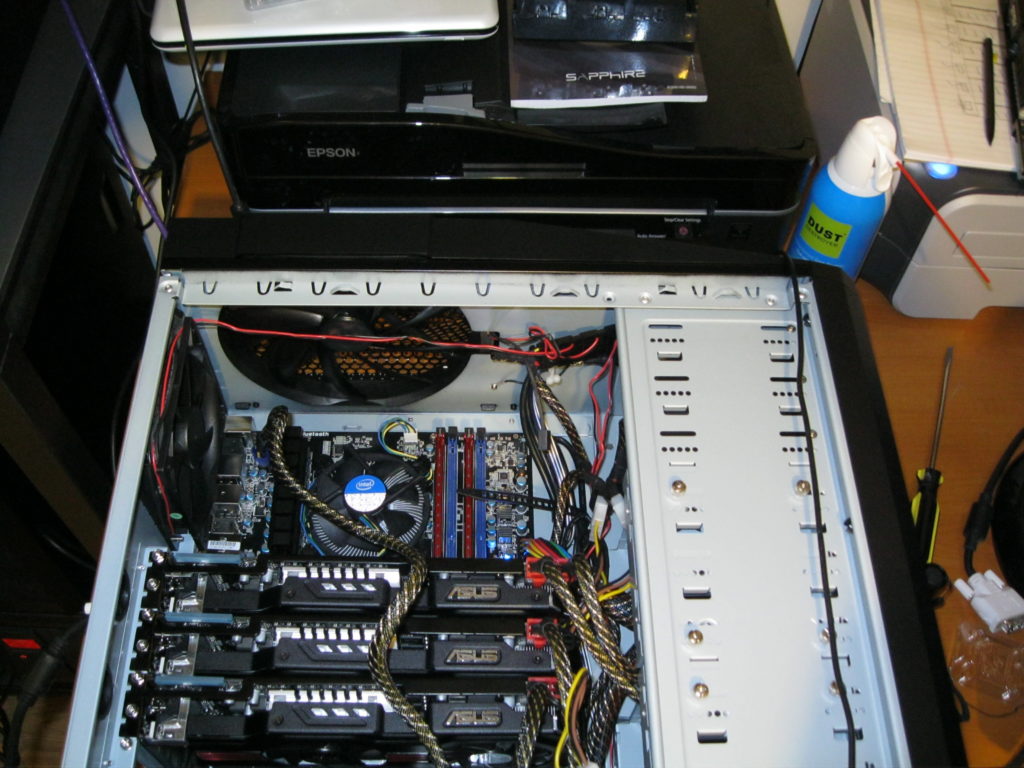
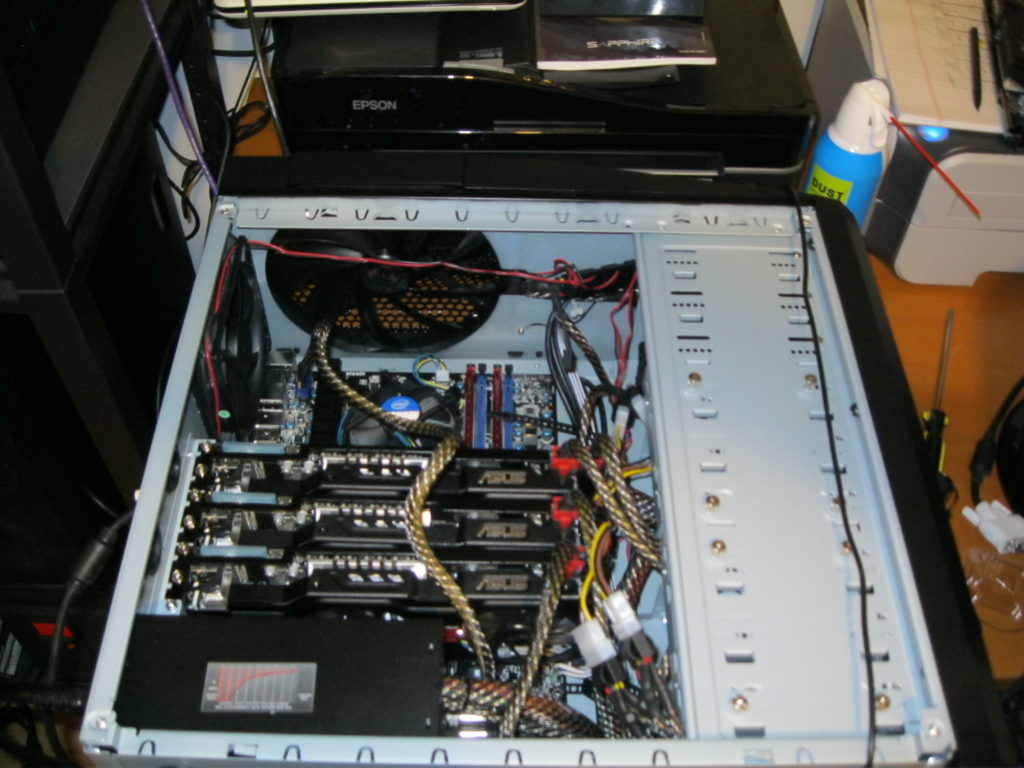
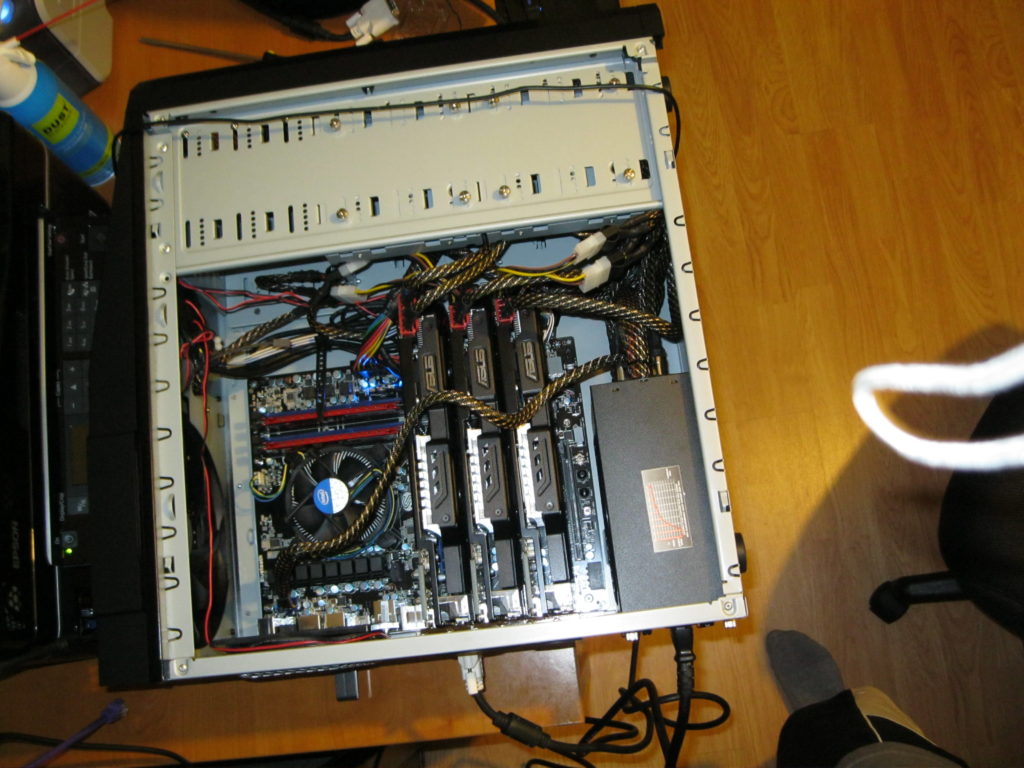
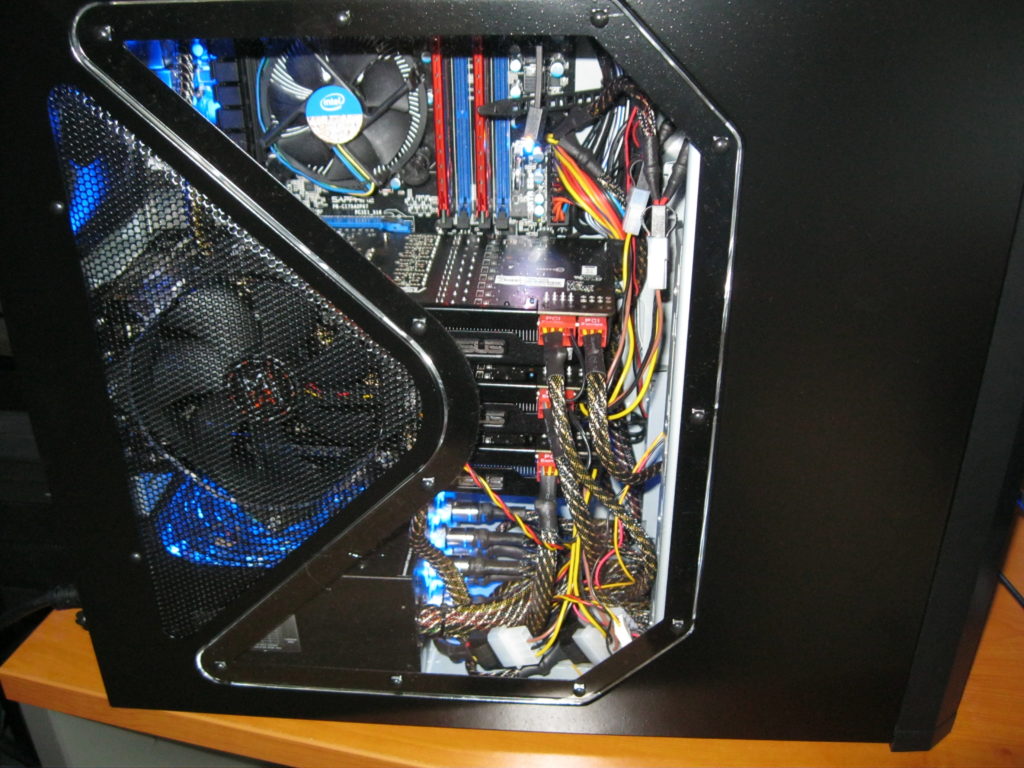
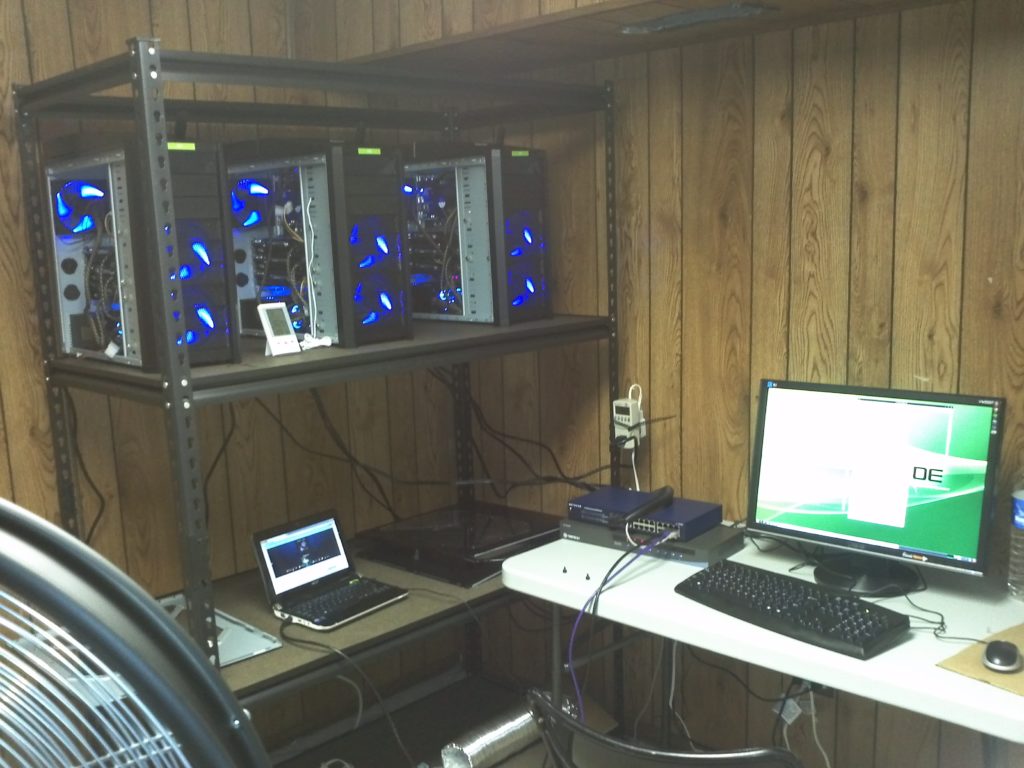
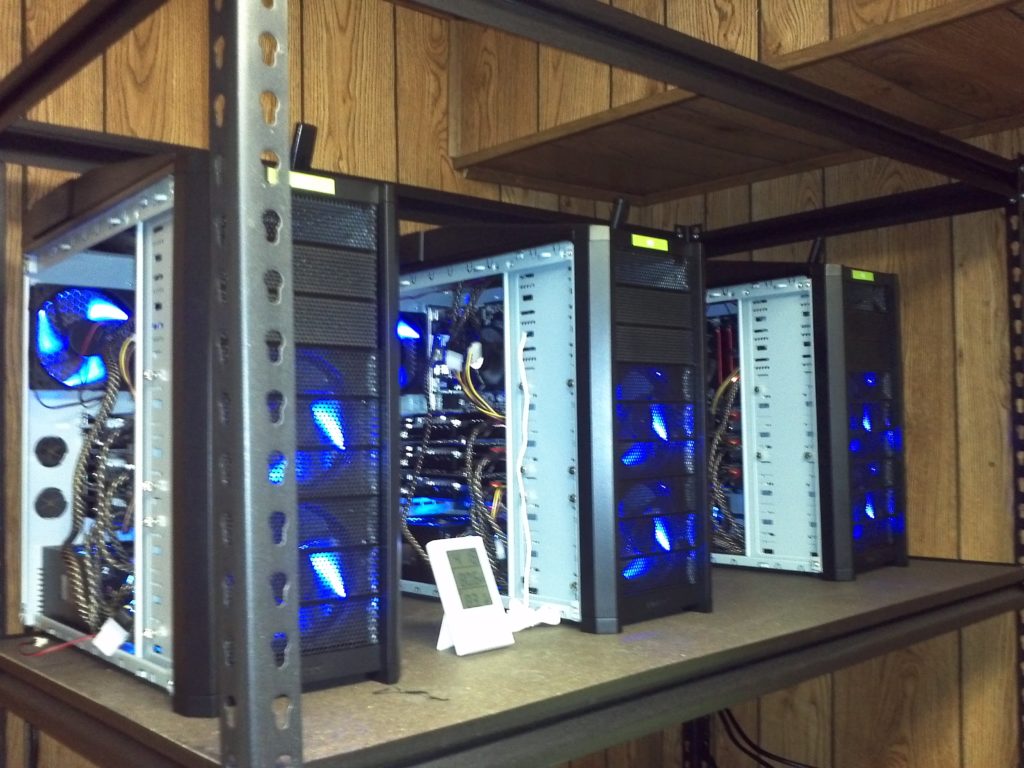
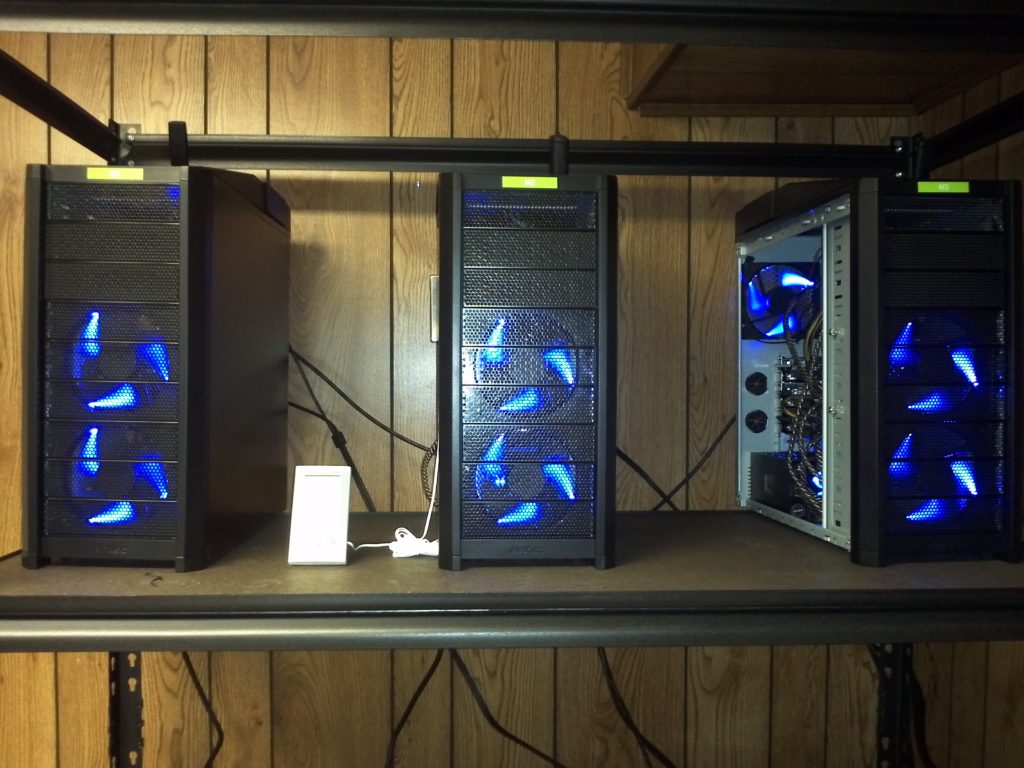
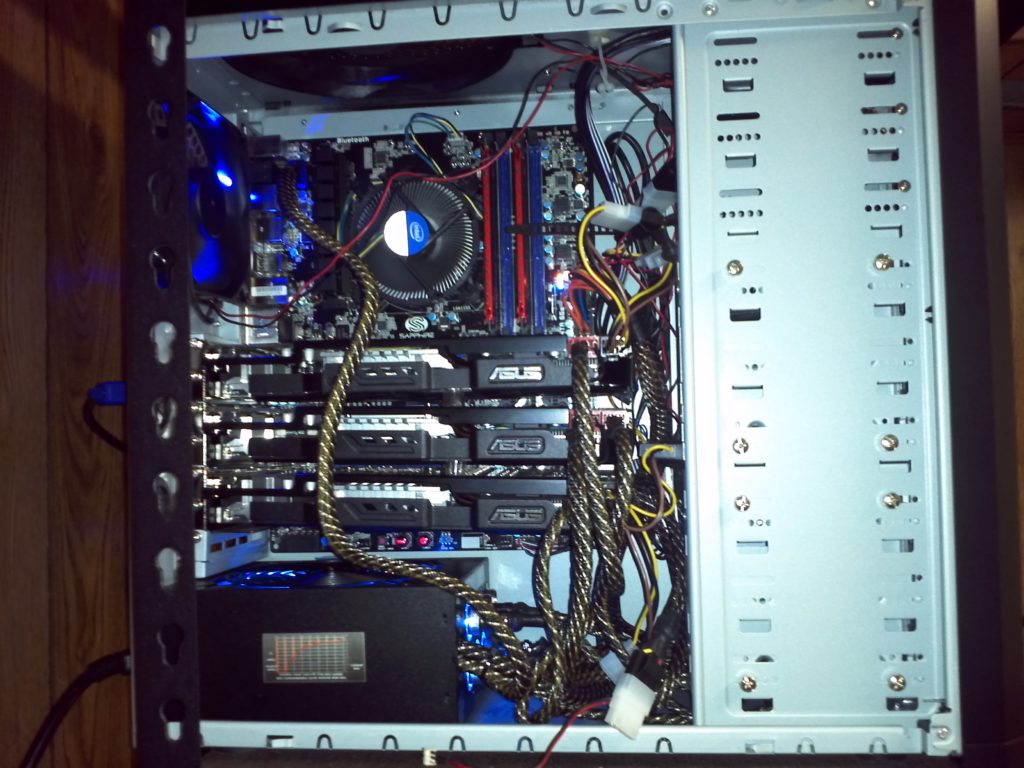
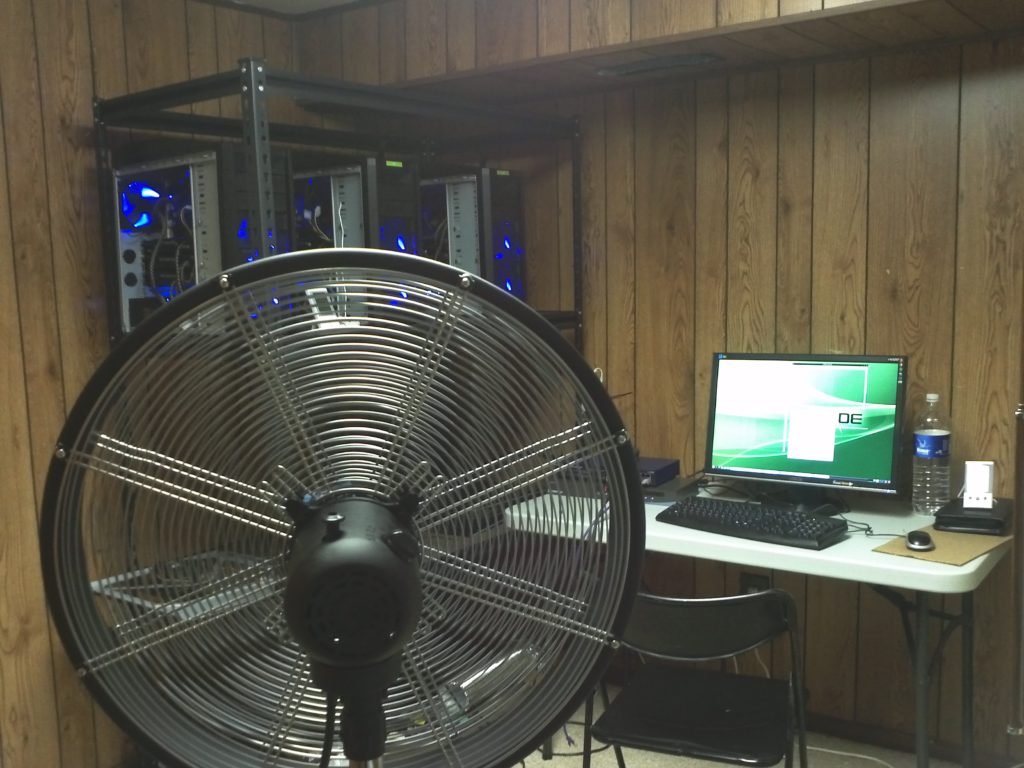
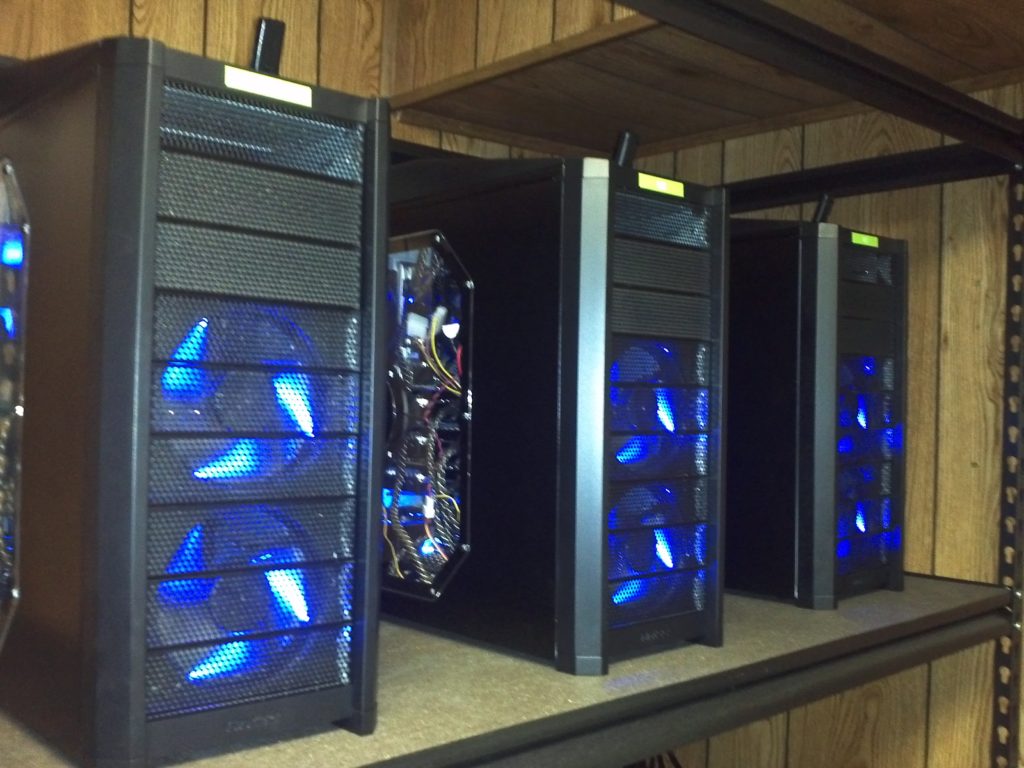
Here are pictures of a few of my rigs


10 steps to implement and deploy your Bitcoin Mining Rigs
Below are the 10 steps to getting your bitcoin mining rigs running. Hopefully, I will be able to answer all your questions later in this E-Book.
- 1. Setup bitcoin mining pool accounts
Assuming you are not solo mining, you will need to create account with 1 or more bitcoin mining pools. Discussed in section 12. - 2. Find a location for your bitcoin miners
You will need to find a good place that you can keep your bitcoin mining rigs. Somewhere they will not be bothered. No kids, pets, weather, or other interferences. - 3. Ensure location quality / resources (Internet, power, cooling)
You will need to ensure that wherever you keep you bitcoin mining rigs you have: An internet connection, enough power, and a suitable operating temperature with enough airflow. Discussed in section 6, 7, and 8. - 4. Asses your budget
Determine how much money you have, and want to invest in bitcoin miners. Weigh the profit, loss, and risks. Discussed in section 2, and 3. - 5. Decide on hardware and purchase hardware
You will need to select and purchase the best hardware according to your budget. All this is explained in section 4. - 6. Build, configure, and test bitcoin rigs
You will need to be capable of building these machines from scratch. Without the knowledge of building computers, it is going to be difficult to be successful in running your own bitcoin mining rig. You must know the ins and outs of these beasts. Also discussed in section 4. - 7. Obtain and implement software and scripts
There are many options to choose from. Will you be using Windows, or Linux? What kind of Bitcoin mining software will you choose? Will you decide to automate your bitcoin mining rigs? The questions will never end. Learn more in section 11. - 8. Setup bitcoin proxy
Now that you have everything setup, you could centralize everything using a bitcoin proxy. This will always keep your login information the same, and allow you to manage mining pools and workers very easily. Discussed in section 13. - 9. Deploy
Finally, deploy your bitcoin miners, and start generating bitcoins! - 10. Overclock
When everything is running smoothly, get even more performance out of your GPUs by overclocking them. Discussed in section 9.
Here are the primary things we will cover in this E-Book:
I apologize for the order of these items, as you may need to jump around through sections to reference terms, and explanations. I did not think I would be elaborating this much.
What is Bitcoin mining?
- 1.1 What is Bitcoin Mining?
- 1.2 Why would I want to mine for Bitcoins?
- 1.3 What is a Bitcoin Mining Rig?
- 1.4 What is CPU Mining?
- 1.5 What is GPU Mining?
- 1.6 What is FPGA Mining?
- 1.8 Why a GPU mines faster than a CPU?
- 1.7 What is ASIC Mining?
Investment
- 2.1 How much money do I have to invest?
- 2.2 How much money do I want to invest?
- 2.3 How much money did you personally invest?
Return on Investment (ROI)
- 3.1 What is the current value of Bitcoin?
- 3.2 How many Bitcoins can I generate per day?
- 3.3 What is Bitcoin difficulty level?
- 3.4 How will the difficulty level affect my Bitcoin mining?
Hardware
- 4.1 What kind of hardware do I need?
- 4.2 What is the best hardware to get for my buck?
- 4.3 Am I capable of building these machines from scratch?
- 4.4 What exact hardware did you use for your Bitcoin miners?
GPU Mining
- 5.1 Where can I compare graphics cards (GPUs)?
- 5.2 20 Popular Mining GPUs
- 5.3 What is mhash rate?
- 5.4 What are stream processors?
- 5.5 Why are ATI GPUs better than Nvidia GPUs for Bitcoin mining?
Networking
- 6.1 What kind of internet connection to I need?
- 6.2 Do I need to configure my firewall to run Bitcoin?
- 6.3 How does the peer finding mechanism work?
Cooling
- 7.1 How am I going to keep these rigs cool?
- 7.2 How am I going to keep the room cool?
- 7.3 How do I measure room temperature?
- 7.4 How hot will my GPUs get and can they overheat?
- 7.5 How can I change the Fan speed on my GPUs?
- 7.6 How do I measure GPU temperatures?
Power
- 8.1 How much power will I need?
- 8.2 How much will my power bill go up?
- 8.3 How do I measure my power usage?
Overclocking
- 9.1 What is overclocking?
- 9.2 Should I use overclocking?
- 9.3 How do I overclock my GPUs?
Managing
- 10.1 Using a node PC to oversee your Bitcoin miners
- 10.2 How do I manage my Bitcoin rigs?
- 10.3 Can I manage them remotely?
Software
- 11.1 What software can I use to run to mine for Bitcoins?
- 11.2 What is ATI Catalyst Control Center, and why do I need it?
- 11.3 What operating systems can I mine for Bitcoins?
- 11.4 Can I run a Bitcoin miner from a USB flash drive?
- 11.5 Automation and batch scripts
Bitcoin mining Pools
- 12.1 What are Bitcoin mining pools (Pool Mining)?
- 12.2 What are the benefits of using a Bitcoin mining pool?
- 12.3 Different types and rewards of mining pools
- 12.4 Comparison of mining pools?
Bitcoin Proxy
- 13.1 What is a Bitcoin mining proxy?
- 13.2 What are the benefits of using a Bitcoin mining proxy?
Some of these answers were derived from https://en.bitcoin.it/wiki/ under the Creative Commons Attribution 3.0 license.
Explaining Bitcoin mining…
1.1 What is Bitcoin Mining?
Simple definition: Bitcoin mining is the process of creating or generating new Bitcoins.
Technical definition: Mining is the process of spending computation power to find valid blocks and thus create new Bitcoins. Technically speaking, mining is the calculation of a hash of the a block header, which includes among other things a reference to the previous block, a hash of a set of transactions and a nonce. If the hash value is found to be less than the current target (which is inversely proportional to the difficulty), a new block is formed and the miner gets 50 newly generated Bitcoins. If the hash is not less than the current target, a new nonce is tried, and a new hash is calculated. This is done millions of times per second by each miner.
Common question: Is mining used for some useful computation? The computations done when mining are internal to Bitcoin and not related to any other distributed computing projects. They serve the purpose of securing the Bitcoin network, which is useful.
1.4 Why would I want to mine for Bitcoins?
Good question! Here are some of my reasons:
For fun
Building Bitcoin mining rigs is fun, well, if you’re a geek. I have thoroughly enjoyed the entire process of building, configuring, testing, and occasionally fist fighting with these machines. Okay, but now the real reason…
Money
If anyone tells you otherwise, the real reason why everyone wants to mine for bitcoins is because you can make money! Yes, that’s right… How you ask? Well, it’s very simple, currently there are millions of US Dollars, British Pounds, and Euros being traded for bitcoins everyday through online marketplaces! In these systems, users place buys and sells themselves on the exchange and the price is set by the market. The exchange usually acts as a mutual platform between the 2 parties holding people’s funds and performing the trade. The exchange may take a small percent or charge a fee on withdrawals/deposits as their cost.
Not only that, there are plenty of online stores that accept bitcoin as currency. You can buy things like electronics, books, music, games, clothing, and more!
Without going into too much detail, you can get all the nitty gritty right here: https://en.bitcoin.it/wiki/Trade
1.3What is a Bitcoin Mining Rig?
A mining rig is a computer system used for mining Bitcoins. The rig might be a dedicated miner where it was procured, built and operated specifically for mining or it could otherwise be a computer that fills other needs, such as performing as a gaming system, and is used to mine only on a part-time basis.
You should read this wiki page for more detailed information, and example Bitcoin mining rig configurations: https://en.bitcoin.it/wiki/Mining_rig
1.4What is CPU Mining?
CPU mining is the process of using a CPU for Bitcoin computations. CPU mining has become less common since GPU mining has been found to be up to 800+ times faster.
The CPU, or central processing unit is usually a removable component that plugs into the computer’s main circuit board, or motherboard and sits underneath a large, metallic heat sink which usually has a fan, a few are cooled by water.
A CPU is designed primarily to be an executive and make decisions, as directed by the software. For example, if you type a document and save it, it is the CPU’s job to turn your document into the appropriate file type and direct the hard disk to write it as a file. CPU’s can also do all kinds of math, as inside every CPU is one or more “Arithmetic/Logic Units” (ALU’s). CPU’s are also highly capable of following instructions of the “if this, do that, otherwise do something else”. A large bulk of the structures inside a CPU are concerned with making sure that the CPU is ready to deal with having to switch to a different task on a moment’s notice when needed.
CPU’s also have to deal with quite a few other things which add complexity, including:
- enforcing privilege levels and the boundaries between user programs and the operating system
- creating the illusion of “virtual memory” to programs
- for the most popular processors, being backwards compatible with legacy code
Due to the fact that CPU mining is quite outdated and obsolete, there is not much need to further mention or compare other mining methods to CPU mining.
1.5What is GPU Mining?
GPU mining is the process of using a graphics card (also known as a video card or graphics card) for Bitcoin computations. GPU mining has become the primary form of generating new bitcoins, as appose to using a CPU.
The GPU, or graphics processing unit, is a part of the video rendering system of a computer. The typical function of a GPU is to assist with the rendering of 3D graphics and visual effects so that the CPU doesn’t have to.
1.6What is FPGA Mining?
Now that you learned a bit about the mining process through a computers CPU and GPU, well discuss the next advanced of mining hardware. FPGA is what is known as a field-programmable gate array (FPGA) is an integrated circuit designed to be configured by a customer or a designer after manufacturing—hence “field-programmable“. The FPGA configuration is generally specified using a hardware description language (HDL), similar to that used for an application-specific integrated circuit (ASIC) (circuit diagrams were previously used to specify the configuration, as they were for ASICs, but this is increasingly rare).
In late 2011 and early 2012, innovative companies like Butterfly Labs, ZTEX in Germany, a grad student in China, and some individuals in the U.S. started offering FPGA-based mining devices. While most of these were based on the $100 Xilinx Spartan6-150 FPGA, the BFL design used an Altera FPGA, which the company sourced at a discounted price.
The Xilinx Spartan6-150-based mining boards achieved about 200 to 220 MH/s per FPGA, and sold for approximately $1 to $2.50 per MH/s.
Some photos of some well put together / advanced FPGA mining rigs:


What are the benefits of FPGA Mining?
There are various major benefits to using FPGA mining, as appose to GPU and CPU mining.
- Integration: Most FPGA mining chips can be easily connected and disconnected from any PC with a simple USB cable.
- Flexibility: Due the fact that this hardware is external as appose to internal GPU and CPU, it makes it easy to replace and maneuver the device from locations or different computers.
- No max connections: One simple computer or even laptop can support dozens of FPGA USB connections with the support of a USB hub, and does not rely at all on the speed of the PC hardware.
- Low Power Consumption: This is a big one! (Small cost of electricity) Each FPGA miner uses on average under 5 watts of power while hashing! GPU mining will use between 500-1200 watts of electricity for each rig, depending on the hardware and amount of GPU’s. This will add a hefty cost to your electricity bill.
1.8What is ASIC mining?
[This section will be updated by December 9th]
1.8Why a GPU mines faster than a CPU
Some Bitcoin users might wonder why there is a huge disparity between the mining output of a CPU versus a GPU.
A GPU is like a CPU, but there are important internal differences that make them suited toward their special tasks. These are the differences that make Bitcoin mining far more favorable on a GPU.
A CPU core can execute 4 32-bit instructions per clock (using a 128-bit SSE instruction) or 8 via AVX (256-Bit), whereas a GPU like the Radeon HD 5970 can execute 3200 32-bit instructions per clock (using its 3200 ALUs or shaders). This is a difference of 800 (or 400 in case of AVX) times more instructions per clock. As of 2011, the fastest CPUs have up to 6, 8, or 12 cores and a somewhat higher frequency clock (2000-3000 MHz vs. 725 MHz for the Radeon HD 5970), but one HD5970 is still more than five times faster than four 12-core CPUs at 2.3GHz (which would also set you back about $4700 rather than $350 for the HD5970).
A GPU is very different. Yes, a GPU can do math, and can also do “this” and “that” based on specific conditions. However, GPUs have been designed so they are very good at doing video processing, and less executive work.
Video processing is a lot of repetitive work, since it is constantly being told to do the same thing to large groups of pixels on the screen. In order to make this run efficiency, video processors are far heavier on the ability to do repetitive work, than the ability to rapidly switch tasks.
GPUs have large numbers of ALU’s, more so than CPU’s. As a result, they can do large amounts of bulky mathematical labor in a greater quantity than CPU’s.
For more info on this topic go here: https://en.bitcoin.it/wiki/Why_a_GPU_mines_faster_than_a_CPU
Investment
2.1How much money do I have to invest?
Ahh, this is a good question I am often asked, and it can be interpreted 2 different ways:
a. How much money do I actually have available to invest in Bitcoin mining?
Well, it’s pretty obvious that only you know the answer to that question. If you can’t answer this question, I suggest you login to your online banking and start keeping better track of your finances ![]()
b. How much money is required in order for me to start mining for Bitcoins?
This was the question you were probably referring to. And unfortunately, there is no single answer to this question. Assuming you have a computer, you can already begin mining for Bitcoins! Yes that is correct! Using your current computers CPU, or GPU you can actually begin generating Bitcoins using various available free software (depending on your operating system). The bad news is that unless you have done the research or actually customized your computer for this type of performance, chances are that you really won’t be able to generate Bitcoins at a feasible rate to make any money (in your lifetime at least).
If you have some money readily available for investment, and based on my current experience you can build a GPU mining machine for as low as about $288. However, that would be with very low-level mining machine with only 1 GPU capable of generating at small mhash rate. I’ll explain what mhash means in section 5.3.
2.2How much money do I want to invest?
This is a tricky question, and all depends on how big of a risk taker you are. I like to put my money to work so I’m a big fan of investing. Anywhere that I can put money, and turn it into more money is usually all I need to hear. But, the most important thing is analyzing your risk and loss.
Let’s be honest, Bitcoin as a currency is the first of its kind, so we really can’t be sure how stable it is, or how long it’s going to be around. Maybe one day the price will crash, as we’ve seen the price has fluctuated pretty violently at times. Maybe governments will get involved, shutting it down, making it illegal, etc.. Maybe people will one day just begin to de-value Bitcoin, and no longer accept it as currency. There are various downfalls that can come about, but here is the way I look at my investment losses; If the worst possible thing happens, which is Bitcoin ceasing to exist PERIOD, what am I left with? Essentially, I am left with a lot of valuable hardware, which is in perfectly good condition. Many people would probably pay some good money for these computers on Ebay or other marketplaces. These machines are a gamers dream with their video rendering capabilities. Not to mention that they each can support up to 18 monitors! They would be great for stock brokers and day traders. Bottom line is, I can probably sell this equipment and make back 70%-75% of my initial investment. Therefor I have my conclusion; I am willing to take a risk in a chance of losing 30% of my investment, and to me it is worth the risk. Some of you won’t be okay with that, by that is why it’s called an INVESTMENT: “A thing that is worth buying because it may be profitable or useful in the future.”
2.3How much money did you personally invest?
If you want to know how much I spent on each machine, I’ll say it flat out:
About $1,600 per machine including shipping. Each machine is currently capable of calculating 1,071 mhash/s. Yes my GPUs are overclocked and we’ll discuss that later in section 9.1.
I also post my exact hardware configuration, and the links to where I purchased it in section 4.4.
Return on Investment (ROI)
3.1What is the current value of Bitcoin?
The current monetary value of Bitcoin can be determined by going to http://Bitcoincharts.com/markets/
At the time of my writing this article, the current value is about $14 USD per Bitcoin. Of course this price is subject to change and will fluctuate. I’ve seen Bitcoin as high as $28 USD, and have seen many people sell at that price too. The price of Bitcoin will unquestionably be one of the two primary factors of your ROI. When started building my rigs, the price of Bitcoin was $20 – $24. At that time, I calculated my ROI to take about 2 months. Obviously, that has changed, and I will explain more in section 3.4 below.
3.2How many Bitcoins can I generate per day?
This depends on 3 main factors:
a. Are you using a Bitcoin Pool or Solo Mining? (More info in section 12.1)
b. What is the current difficulty rate? (More info in section 3.3)
c. What kind of hardware are you using? (More info in section 4.1)
Using this calculator, you can get a pretty good estimate of how many Bitcoins you can generate, and how much money you could make if you sell those Bitcoins for USD.
3.3What is Bitcoin difficulty level
Difficulty is a measure of how difficult it is to find a new block compared to the easiest it can ever be. The difficulty changes every 2016 blocks.
The following is the formula, which calculates the difficulty:
difficulty = maximum_target / current_target
(target is a 256 bit number)
What is the maximum difficulty?
The maximum difficulty is roughly: maximum_target / 1, which is a ridiculously huge number (about 2^224).
The actual maximum difficulty is when current_target=0, but we would not be able to calculate the difficulty if that happened. (fortunately it never will, so we’re ok.)
Can the difficulty go down?
Yes it can. See discussion in target.
What is the minimum difficulty?
The minimum difficulty, when the target is at the maximum allowed value, is 1.
For more information on Difficulty please see: https://en.bitcoin.it/wiki/Difficulty
I also suggest reading about Blocks: https://en.bitcoin.it/wiki/Block
3.4How will the difficulty level affect my Bitcoin mining?
A simple answer:
The higher the difficulty rate is, the harder is is to create Bitcoins. There, that was simple ![]()
If you want more detailed information, see section 3.3 above.
Hardware
4.1What kind of hardware do I need?
In order to mine for Bitcoins, you generally need the same hardware as a regular computer such as: Motherboard, CPU, Power Supply, Memory (RAM), GPU, Harddrive OR USB Flash drive
Additionally you may need some other components such as: Ethernet cable, Keyboard, Mouse, and Monitor. The Keyboard, Mouse, and Monitor components are only required for the initial setup and configuration, and do not need to be connected in order to actually continue mining.
Some other components are optional such as a computer case, Hard drive, and CD-Rom drive.
4.2What is the best hardware to get for my buck?
I won’t spend too much time on this question because there is an extremely helpful list of hardware for example Bitcoin mining rigs, and where to purchase. It is posted below:
I also provide a list of the exact hardware that I purchased for my rigs in section 4.4 below. I did a lot of research before buying my hardware, although I did not see the list shown below before making my purchases, so consider yourself lucky! Prices are always changing and hardware always goes down in cost, so I definitely encourage you to do some research on your own too.
Here are a few main things to keep in mind:
Motherboard: You want find a motherboard with as many PCIe x16 or PCIe x8 slots as possible. This will determine how many GPUs you will be able to use in your rig.
CPU: Although we are going to be using our GPUs to mine for Bitcoins, you still need a decent CPU in order to keep the machine stable. I would reccomend any of the following types of CPUs in order from worst to best: Dual Core, Quad Core, Corei3, Corei5, Corei7. I listed only intel CPUs since they are most common. Here is a great resource for CPU benchmarks / prices: http://www.cpubenchmark.net/
GPU: This will be your most important investment since it is the main factor in dtermining
RAM: You don’t need much ram at all 1-2 GB should be just fine.
This list of hardware is from: https://en.bitcoin.it/wiki/Mining_rig
Typical Dedicated Miner Configurations Using a Tower
One ATI 5830, Approximately 245 Mhash/s
| Component | Description | Source | Amount |
|---|---|---|---|
| Chassis | n/a | n/a | n/a |
| Power Supply | Rosewill Green Series RG530-S12 530W, 80 PLUS Certified | NewEgg | $50 |
| Motherboard | Foxconn M61PMP-K AMD | NewEgg | $45 |
| CPU | AMD Sempron 140 | NewEgg or Amazon | $38 |
| Memory | 2GB DDR3 | NewEgg | $17 |
| Graphics card | Radeon HD 5830 | NewEgg or Amazon ($153) | $110 |
| Case Fan | n/a | n/a | n/a |
| Storage | Western Digital Caviar 80GB | NewEgg | $17 |
| Media Drive | DVD Rom Drive | n/a | n/a |
| Keyboard, Mouse and Display | n/a | n/a | n/a |
| Total | (Approx: $1.1755 /Mhash) | $288 + s/h/t |
Three ATI 5770s, Approximately 630 Mhash/s
| Component | Description | Source | Amount |
|---|---|---|---|
| Power Supply | Rosewill Green Series RG530-S12 530W, 80 PLUS Certified | NewEgg | $50 |
| Motherboard | ASRock 890GX EXTREME4 | NewEgg | $125 |
| CPU | AMD Sempron 130 | NewEgg | $30 |
| Memory | 2GB DDR3 | NewEgg | $17 |
| Graphics card | Sapphire Radeon HD5770 1GB DDR5 | superbiiz or Amazon | $339 ($113 x 3) |
| Storage | Western Digital Caviar 80GB | NewEgg | $17 |
| Total | (Approx: $1.0412 /Mhash) | $578 + s/h/t |
Two ATI 5850s, Approximately 600 Mhash/s
| Component | Description | Source | Amount |
|---|---|---|---|
| Chassis | n/a | n/a | n/a |
| Power Supply | CORSAIR Builder Series CX600 V2 600W , 80 PLUS Certified | NewEgg | $70 |
| Motherboard | MSI 870-G45 AM3 AMD 770 ATX | Amazon or NewEgg ($5 more) | $70 |
| CPU | AMD Sempron 140 | NewEgg or Amazon (same price) | $39 |
| Memory | 2GB DDR3 | NewEgg | $17 |
| Graphics card | Sapphire Radeon HD 5850 XTREME | Amazon | $322 ($161 x 2) |
| Case Fan | n/a | n/a | n/a |
| Storage | Western Digital Caviar 80GB | NewEgg | $17 |
| Media Drive | DVD Rom Drive | n/a | n/a |
| Keyboard, Mouse and Display | n/a | n/a | n/a |
| Total | (Approx: $0.8917 /Mhash) | $535 + s/h/t |
Three ATI 5850s, Approximately 900 Mhash/s
| Component | Description | Source | Amount |
|---|---|---|---|
| Chassis | n/a | n/a | n/a |
| Power Supply | PC Power & Cooling Silencer Mk II 950W, 80 PLUS Silver Certified | Directron | $120 |
| Motherboard | MSI 890FXA-GD70 | Amazon | $195 |
| CPU | AMD Sempron 140 | NewEgg or Amazon | $39 |
| Memory | 2GB DDR3 | NewEgg | $17 |
| Graphics card | Sapphire Radeon HD 5850 XTREME | Amazon | $483 ($161 x 3) |
| Case Fan | n/a | n/a | n/a |
| Storage | Western Digital Caviar 80GB | NewEgg | $17 |
| Media Drive | DVD Rom Drive | n/a | n/a |
| Keyboard, Mouse and Display | n/a | n/a | n/a |
| Total | (Approx: $0.9677 /Mhash) | $871 + s/h/t |
Three ATI 6990s, Approximately 2.1 Ghash/s
| Component | Description | Source | Amount |
|---|---|---|---|
| Chassis | CoolerMaster HAF X | Amazon | $179 |
| Power Supply | SILVERSTONE ST1500 1500W, 80 PLUS Silver Certified | Newegg | $365 |
| Motherboard | MSI 890FXA-GD70 | Amazon | $195 |
| CPU | AMD Sempron 140 | NewEgg or Amazon | $39 |
| Memory | 2GB DDR3 | NewEgg | $17 |
| Graphics card | 3 * Radeon HD 6990 | NewEgg | $2220 ($740 × 3) |
| Storage | Western Digital Caviar 80GB | NewEgg | $17 |
| Keyboard, Mouse and Display | n/a | ||
| Total | (Approx: $1.4438 /Mhash) | $3,032 + s/h/t |
Typical Dedicated Miner Configurations Using a Rack Mount
Budget AMD Sempron / Dual ATI 6990: Approximately 1.4 Ghash/s
| Component | Description | Source | Amount |
|---|---|---|---|
| Chassis | IPC-4370S 4U | P-Link Computer | $85 (incl s/h) |
| Power Supply | PC Power & Cooling Silencer Mk II 950W, 80 PLUS Silver Certified | Directron | $120 |
| Motherboard | MSI 870-G45 AM3 AMD 770 ATX | Amazon or NewEgg ($5 more) | $70 |
| CPU | AMD Sempron 140 | NewEgg or Amazon | $39 |
| Memory | 2GB DDR3 | NewEgg | $17 |
| Graphics card | 2 * Radeon HD 6990 | NewEgg | $1480 ($740 × 2) |
| Storage | Western Digital Caviar 80GB | NewEgg | $17 |
| Keyboard, Mouse and Display | n/a | ||
| Total | (Approx: $1.3057 /Mhash) | $1,828 + s/h/t |
Typical Multipurpose Miner Configurations
High-end Intel-based miner/gaming rig: single ATI 6990, Approximately 750 Mhash/s
| Component | Description | Source | Amount |
|---|---|---|---|
| Chassis | CoolerMaster HAF 932 | Amazon | $140 |
| Power Supply | PC Power & Cooling Silencer Mk II 950W, 80 PLUS Silver Certified | Directron | $120 |
| Motherboard | MSI P67A-GD65 | Amazon | $173 |
| CPU | Intel i5-2500k | Amazon | $220 |
| Memory | G.SKILL Value Series 4GB | NewEgg | $30 |
| Graphics card | Radeon HD 6990 | NewEgg | $734 |
| Heat Sink Fan | CoolerMaster Hyper212+ | NewEgg | $40 |
| Storage | Seagate 1TB 7200RPM HDD | NewEgg | $70 |
| Media Drive | ASUS DVD-RW | NewEgg | $22 |
| Keyboard | LITE-ON SK-1788/BS PS/2 Keyboard | NewEgg | $8 |
| Mouse | V7 M30P20-7N PS/2 Mouse | NewEgg | $7 |
| Display | LG IPS231P-BN Black 23″ 6ms IPS | NewEgg | $250 |
| Total | $1814 + s/h/t |
High-end AMD-based miner/gaming rig: single ATI 6990, Approximately 750 Mhash/s
| Component | Description | Source | Amount |
|---|---|---|---|
| Chassis | CoolerMaster HAF 932 | Amazon | $140 |
| Power Supply | PC Power & Cooling Silencer Mk II 950W, 80 PLUS Silver Certified | Directron | $120 |
| Motherboard | Biostar TA890FXE | NewEgg | $140 |
| CPU | AMD Phenom II x6 1100T Black Edition | Amazon | $190 |
| Memory | G.SKILL Value Series 4GB | NewEgg | $30 |
| Graphics card | Radeon HD 6990 | NewEgg | $734 |
| Heat Sink Fan | CoolerMaster Hyper212+ | NewEgg | $40 |
| Storage | Seagate 1TB 7200RPM HDD | NewEgg | $70 |
| Media Drive | ASUS DVD-RW | NewEgg | $22 |
| Keyboard | LITE-ON SK-1788/BS PS/2 Keyboard | NewEgg | $8 |
| Mouse | V7 M30P20-7N PS/2 Mouse | NewEgg | $7 |
| Display | LG IPS231P-BN Black 23″ 6ms IPS | NewEgg | $250 |
| Total | $1760 + s/h/t |
Mid-level AMD-based miner/gaming/workstation rig: single ATI 6870, Approximately 300 Mhash/s
| Component | Description | Source | Amount |
|---|---|---|---|
| Chassis | CoolerMaster Centurion 5 | NewEgg | $50 |
| Power Supply | PC Power & Cooling Silencer Mk II 950W, 80 PLUS Silver Certified | Directron | $120 |
| Motherboard | ASRock 890GX Pro3 | NewEgg | $110 |
| CPU (incl. stock heatsink + fan) | AMD Phenom II X4 955 Black Edition | NewEgg | $114 |
| Memory | G.SKILL Value Series 4GB | NewEgg | $30 |
| Graphics card | Radeon HD 6870 | Amazon | $165 |
| Storage | Seagate 1TB 7200RPM HDD | NewEgg | $70 |
| Media Drive | ASUS DVD-RW | NewEgg | $21 |
| Keyboard | LITE-ON SK-1788/BS PS/2 Keyboard | NewEgg | $8 |
| Mouse | V7 M30P20-7N PS/2 Mouse | NewEgg | $7 |
| Display | HANNspree By Hanns-G HF225DPB 21.5″ | NewEgg | $120 |
| Total | $815 + s/h/t |
Mid-level Intel-based miner/gaming/workstation rig: single ATI 6870, Approximately 300 Mhash/s
| Component | Description | Source | Amount |
|---|---|---|---|
| Chassis | CoolerMaster Centurion 5 | NewEgg | $50 |
| Power Supply | Antec Earthwatts EA-650 GREEN 650W, 80 PLUS BRONZE certified | NewEgg | $65 |
| Motherboard | MSI PH67S-C43 (B3) | NewEgg | $85 |
| CPU (incl. stock heatsink + fan) | Intel Core i3-2100 | Amazon | $122 |
| Memory | G.SKILL Value Series 4GB | NewEgg | $30 |
| Graphics card | Radeon HD 6870 | Amazon | $165 |
| Storage | Seagate 1TB 7200RPM HDD | NewEgg | $70 |
| Media Drive | ASUS DVD-RW | NewEgg | $21 |
| Keyboard | LITE-ON SK-1788/BS PS/2 Keyboard | NewEgg | $8 |
| Mouse | V7 M30P20-7N PS/2 Mouse | NewEgg | $7 |
| Display | HANNspree By Hanns-G HF225DPB 21.5″ | NewEgg | $120 |
| Total | $743 + s/h/t |
4.3Am I capable of building these machines from scratch?
The first question I would ask is: Have you ever built your own computer? If the answer is yes, then there is probably no reason why you can’t build a Bitcoin mining machine yourself either. It requires standard desktop hardware, just like you would use to build a personal computer.
Here is a very cool 3 minutes video of “phreneticdotnet” building a bestly bitcoin mining rig!
If you have never built your own computer, I’m not sure whether or not I should encourage you to move forward and try to build one. If you have a friend or colleague with experience who can help you out, I would say don’t hesitate! Even if you are pretty handy with electronics, and know about computers or the components that comprise them, then here are a few guides on how to build your own computer:
http://www.build-your-own-computers.com/
http://www.kitchentablecomputers.com/started.php
http://www.build-gaming-computers.com/
http://www.pcworld.com/article/203950/how_to_build_your_own_pc_part_1.html
http://www.youtube.com/watch?v=QQQ30QoF_-8
There are plenty of resources out there, do some googling: “How to build your own computer”.
4.4What exact hardware did you use for your Bitcoin miners?
Below is the exact hardware that I bought for my rigs. You will notice that the graphics cards that I purchased for my rigs may currently out of stock on Newegg (ASUS Radeon 6950). However, we will discuss various other graphic card choices in the next section. There are even better cards available but all depends on your budget. Also, I am aware that I could have gotten some of these compnents slightly cheaper if I shopped around more. The bottom line is I like Newegg They are prompt, shipping is fast, and always reliable. I’d rather buy all my parts from the same vendor, and 99% of the time it is Newegg.com.


GPU Mining
5.1Where can I compare graphics cards (GPUs)?
The following link, is a VERY important one. It should be your bible in choosing, and comparing available GPUs that are on the market:
Luckily, they recently added “20 Popular Mining Cards” to this document, I’ll include it below. This wiki page lists out every GPU, the model, the mhash/s (discussed in section 5.3), the slot type, watts, clock, and other notes related to overclocking and configuration.
Mhash is explained in the next section: 5.3
- Mhash/s: millions hashes per second (raw speed performance ; may not be very energy efficient with some models)
- Mhash/J: millions hashes per joule (energy efficiency ; 1 joule of energy is spent for 1 watt in 1 second)
- Watts: (maximum power consumption, i.e. energy per unit of time : 1 W = 1 J/s)
- Clock: (in MHz) refers to the Shader clock only with nVidia cards (not Core or Memory). With AMD card the shader clock is not separate, but is part of the GPU clock.
- Stream processors (SP): (Shader Units)
Keep this in mind:
Mhash/s: The main goal you want to achieve is lowest cost vs highest mhash rate. The more mhash/s (megahash per second) a GPU can produce the faster is can calculate and process Bitcoin data.
Watts: Another thing to note are watts. Your computers power supply must have enough watts in order to power these cards. If you have 3 GPUs that use 200 watts, but only have a 500 watt power supply 1 of two things will happen. It won’t power up properly and some components in the machine will not get enough power. Or YOU CAN BLOW OUT THE POWER SUPPLY. Yes that’s right, it has happened to me. At one point I drew more power than the power supply (PSU) could handle, and my machine shut off, permanently. Well, until I replaced the power supply, which is a pain in the ass considering it is wired up everywhere inside the machine.
Slots: Some GPUs have different slot or plug configurations. The most common for high performace GPUs are PCIe x 16 or PCI x 8. Make sure your motherboard has these slots so you will be able to plug your GPUs in.
5.220 Popular Mining GPUs
| Model | Price | Availability | Avg. Mhash/s | Mhash/J | Mhash/$ |
|---|---|---|---|---|---|
| 5770 | $136 | Moderate | 212.83 | 1.45 | 1.56 |
| 5830 | $129.99 | Moderate | 286.45 | 1.4 | 1.59 |
| 5850 | $161 | Limited | 325.49 | 1.73 | 2.02 |
| 5870 | $350 | Limited | 393.46 | 1.9 | 1.12 |
| 5970 | $730 | V. Limited | 655.83 | 2.01 | 0.90 |
| 6750 | $116 | Easy | 167.59 | 1.44 | |
| 6770 | $137 | Easy | 196.67 | 1.44 | |
| 6850 | $160 | Easy | 213.7 | 1.35 | 1.34 |
| 6870 | $190 | Easy | 278.31 | 1.73 | 1.46 |
| 6950 | $250 | Easy | 360.62 | 1.8 | 1.44 |
| 6970 | $350 | Easy | 389.55 | 1.72 | 1.11 |
| 6990 | $770 | Limited | 758.82 | 1.91 | 0.99 |
| 5830×2 | $360 | Moderate | 525 | 1.46 | |
| 5850×4 | $644 | Limited | 1360 | 1.94 | 2.11 |
| 5870×2 | $700 | Limited | 787.5 | 0.84 | 1.13 |
| 6770×2 | $274 | Easy | 464 | 1.69 | |
| 6950×4 | $1,000 | Easy | 1316 | 1.51 | 1.32 |
| 6970×2 | $700 | Easy | 769 | ~1.6 | 1.10 |
| 6990×2 | $1,540 | Limited | 1568 | ~1.7 | 1.02 |
| 6990×3 | $2,310 | Limited | 2094 | ~1.8 | 0.91 |
5.3What is mhash rate?
Mhash/s means megahashes per second, or 1,000,000 hashes per second, which is the raw speed performance each GPU is capable of. As mentioned previously, The more mhash/s (megahash per second) a GPU can produce the faster is can calculate and process Bitcoin data. There really is not much more to know ![]()
Also, you might see the term gigahash as well, or ghash/s. This is equal to 1000 mhash/s.
5.4What are stream processors?
Stream processing is a computer/hardware programming technique that allows some applications to more easily exploit a limited form of parallel processing.
Most new video cards have stream processors. Basically video cards have different shaders that are used as small processors to process parts of the image, a stream processor is a generic shader that can be turned into a specific shader on demand (depending on the need). The stream processor is what does a huge portion of the actual rendering. So basically each stream processor is like a processor for a video card. Doubling the number of stream processors does pretty much double the speed of the video card for rendering stuff
Learn more about stream processing here: http://en.wikipedia.org/wiki/Stream_processing
5.5Why are AMD (ATI) GPUs better than Nvidia GPUs for Bitcoin mining?
Firstly, AMD designs GPUs with many simple ALUs/shaders (VLIW design) that run at a relatively low frequency clock (typically 1120-3200 ALUs at 625-900 MHz), whereas Nvidia’s microarchitecture consists of fewer more complex ALUs and tries to compensate with a higher shader clock (typically 448-1024 ALUs at 1150-1544 MHz). Because of this VLIW vs. non-VLIW difference, Nvidia uses up more square millimeters of die space per ALU, hence can pack fewer of them per chip, and they hit the frequency wall sooner than AMD which prevents them from increasing the clock high enough to match or surpass AMD’s performance. This translates to a raw ALU performance advantage for AMD:
AMD Radeon HD 6990: 3072 ALUs x 830 MHz = 2550 billion 32-bit instruction per second
Nvidia GTX 590: 1024 ALUs x 1214 MHz = 1243 billion 32-bit instruction per second
This approximate 2x-3x performance difference exists across the entire range of AMD and Nvidia GPUs. It is noticeably visible in all ALU-bound GPGPU workloads such as Bitcoin, password bruteforcers, etc.
Secondly, another difference favoring Bitcoin mining on AMD GPUs instead of Nvidia’s is that the mining algorithm is based on SHA-256, which makes heavy use of the 32-bit integer right rotate operation. This operation can be implemented as a single hardware instruction on AMD GPUs, but requires three separate hardware instructions to be emulated on Nvidia GPUs (2 shifts + 1 add). This alone gives AMD another 1.7x performance advantage (~1900 instructions instead of ~3250 to execute the SHA-256 compression function).
Combined together, these 2 factors make AMD GPUs overall 3x-5x faster when mining Bitcoins.
Networking
6.1What kind of internet connection to I need?
You don’t need any special or crazy fast internet connection or configuration. Any standard high speed internet connection should be able to handle many Bitcoin miners just fine. I would recommend 5mbps+.
Also, I would recommend that all Bitcoin miners are connected through a wired internet connection for stability and reliability. I’ve has some spotty issues using wifi for bitcoin mining, it’s simply not worth the hassle.
6.2Do I need to configure my firewall to run Bitcoin?
Bitcoin will connect to other nodes, usually on tcp port 8333. You will need to allow outgoing TCP connections to port 8333 if you want to allow your Bitcoin client to connect to many nodes. Bitcoin will also try to connect to IRC (tcp port 6667) to meet other nodes to connect to.
If you want to restrict your firewall rules to a few ips and/or don’t want to allow IRC connection, you can find stable nodes in the fallback nodes list. If your provider blocks the common IRC ports, note that lfnet also listens on port 7777. Connecting to this alternate port currently requires either recompiling Bitcoin, or changing routing rules. For example, on Linux you can evade a port 6667 block by doing something like this:
echo 173.246.103.92 irc.lfnet.org >> /etc/hosts
iptables -t nat -A OUTPUT -p tcp --dest 173.246.103.92 --dport 6667 -j DNAT --to-destination :7777 -m comment --comment "Bitcoind irc connection"
6.3How does the peer finding mechanism work?
Bitcoin finds peers primarily by connecting to an IRC server (channel #Bitcoin on irc.lfnet.org). If a connection to the IRC server cannot be established (like when connecting through TOR), an in-built node list will be used and the nodes will be queried for more node addresses.
Cooling
7.1How am I going to keep these rigs cool?
This is not to be overlooked, and is a major concern among people who mine for Bitcoins. The first step in keeping your rigs cool is to regulate the temperature of the room that your miners will be housed. I discuss the details of regulating room temperature in the next section 7.2.
If you already have your room controlled at a reasonable temperature, then here are several other suggestions to keep your rigs running cool.
Computer Casing: Although I’ve seen MANY rigs laying around without a case, I would certainly recommend keeping your hardware protected inside of a PC case. Exposed hardware is never really a safe option, especially if you have kids, pets, or other factors that could come in contact with your hardware. Assuming you are going to case your rig, getting a good computer case is important for keeping the hardware cool. I recommend getting high performance gaming cases / enclosures from brands like Antec, and Thermaltake. As you can see from the hardware above in section 4.4, I have chosen the Antec 900 ATX Mid Tower case. This case has multiple fans and is optimized for airflow…
1 x 120mm TriCool rear fan with 3-speed switch control
2 x 120mm TriCool blue LED front fans with 3-speed switch control to cool HDDs
1 x 200mm top fan
I liked the fan setup because all the hot air is exhausted from the back, and top of the cases. This gives me a predictable direction of where my hot air will be moving towards. Also, be sure to keep your wiring inside the case clean. Bulky clumps of wires will block airflow!
More / upgraded fans: I have taken an extra step, and installed 3 more high performance fans in my cases.
2 Vantec Tornado Fans which are placed internally right in front of the 2 x 120mm fans displayed on the front of the case.
As well, as a 120mm Ultra Kaze fan on the inside of the side panel vent.
Let me just tell you, this rigs are LOUD. They sound like mini jet engines. Hopefully you have a basement or somewhere you could keep them where the noise should not be an issue. Here are the specs of the fans:
Vantec Tornado 92mm Double Ball Bearing High Air Flow Case Fan – Model TD9238H
RPM: 4800 RPM
Air Flow: 119 CFM
Noise: Level 56.4 dBA
Scythe DFS123812-3000 “ULTRA KAZE” 120 x 38 mm Case Fan
RPM: 3000 RPM
Air Flow: 133.60 CFM
Noise Level: 45.90 dBA
As I said before, the main factor in keeping this rigs cool is keeping the room cool. Good airflow, and good temperature should be all you need to keeping things cool. Check out the section below for how to keep the room cool.
7.2How am I going to keep the room cool?
Keeping the room cool is going to have its challenges, especially if you plan on running 2+ mining rigs in there. These machines basically turn into little heaters, which are exhausting hot air 24/7.
I would suggest trying to keep the room temperature 75°F and below. 71°F would be ideal, and I would say 82°F being the max.
Air conditioning: Hopefully this is something you have in your home, if not, my empathy goes out to you and your miners! ![]() Obviously this would be the first step into keeping any room in your home cool. So make sure you keep your rigs in a cool room, basements are ideal.
Obviously this would be the first step into keeping any room in your home cool. So make sure you keep your rigs in a cool room, basements are ideal.
Air Duct Booster: This is a little trick I’ve learned over the past, but I’ve taken it a step further in my Bitcoin mining scenario. In order to get the most out of the cool air being sent from the air conditioner through the ducts, I have removed the metal casing that cover most vents, and placed a high powered fan a few feet inside the of air duct. Then I have attached an aluminum wired air hose, with an air tight seal using duct tape, and attached another high powered fan on the end of it. At this point, I have a hose which I can direct in any direction which is literally blasting cool air!
Box Fans / Oscillating Fans: Large oscillating are good to keep near your rigs, they are very good circulating large amounts of airflow around the room, and preventing the room from getting stale.
Room Exhaust Fan: If you plan on keeping your rigs in a closed room, you better be up for the challenge. Even if you have an air conditioning supply to the closed room, it will constantly be battling with the heat from your miners (depending on how many you have). In my case, I am keeping my rigs is in a pretty small room, which is enclosed. After many tests, and attempts to keeping the room cool, I had no choice but to build an exhaust system. Basically, I cut a large circular hole in the wall closest to where the miners would be flushing out hot air. Then I place an industrial exhaust fan which would suck the hot air out of the room. Yes, I am making sound a lot simpler than it actually was. Here is a pic:
I’m sure there are other tips and tricks, but these are some that I use. If it is winter time and you have a window nearby, it would be okay to keep that cracked to let cool air in, although it is not recommended to keep hardware exposed to natural outdoor weather. In doing so, you can start dealing with other issues such as humidity, which will factor in on hardware performance and shelf life.
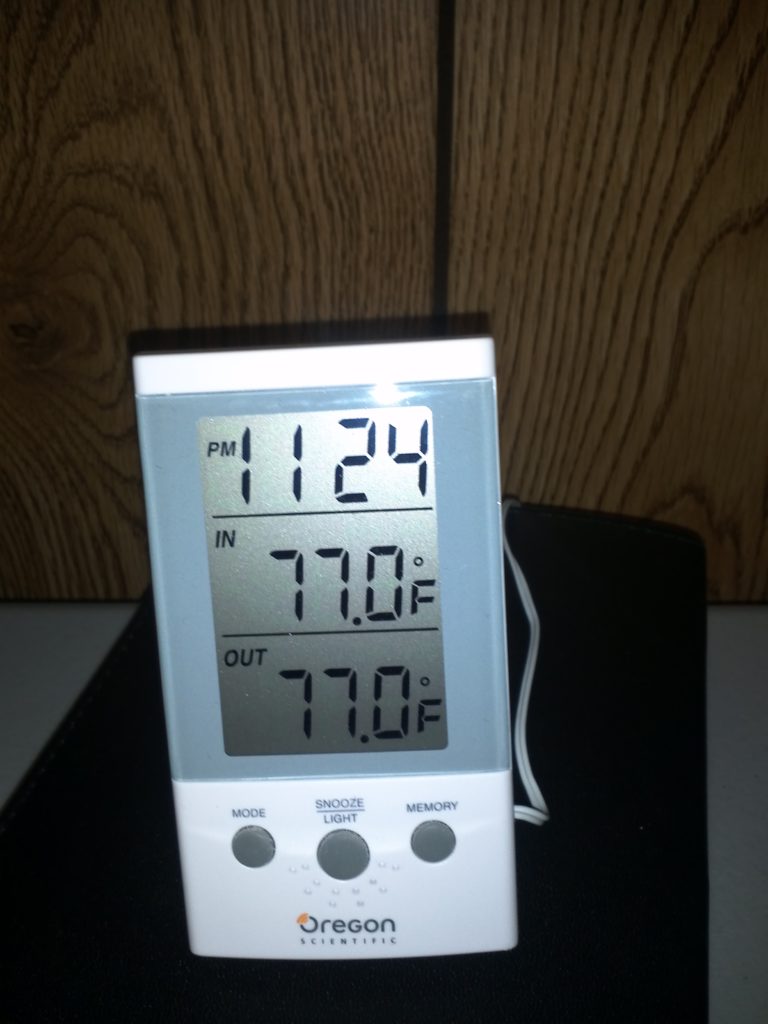
7.3How do I measure room temperature?
Easiest thing to do is to get yourself a Digital Temperature Monitor
If you are not onsite and want to check the temperature remotely you can get one of these USB Temperature Sensors. Personally I use the Hid TEMPer V10.6.0: It is a measurement device using a USB port to connect to a computer or other machines. Here is a screenshot:

7.4How hot will my GPUs get and can they overheat?
At full load, your GPUs will get HOT! ![]()
I’ve seen GPUs go up to 92°C+ (That’s 198 °F). Ideal temperature for your cards would be about 73°C or lower.
Yes GPUs can overheat! That is why it is so important to keep your room and rigs cool, so your GPUs have optimal temperatures to operate in. Cooler GPUs will output better performance, and that is the goal, isn’t it?
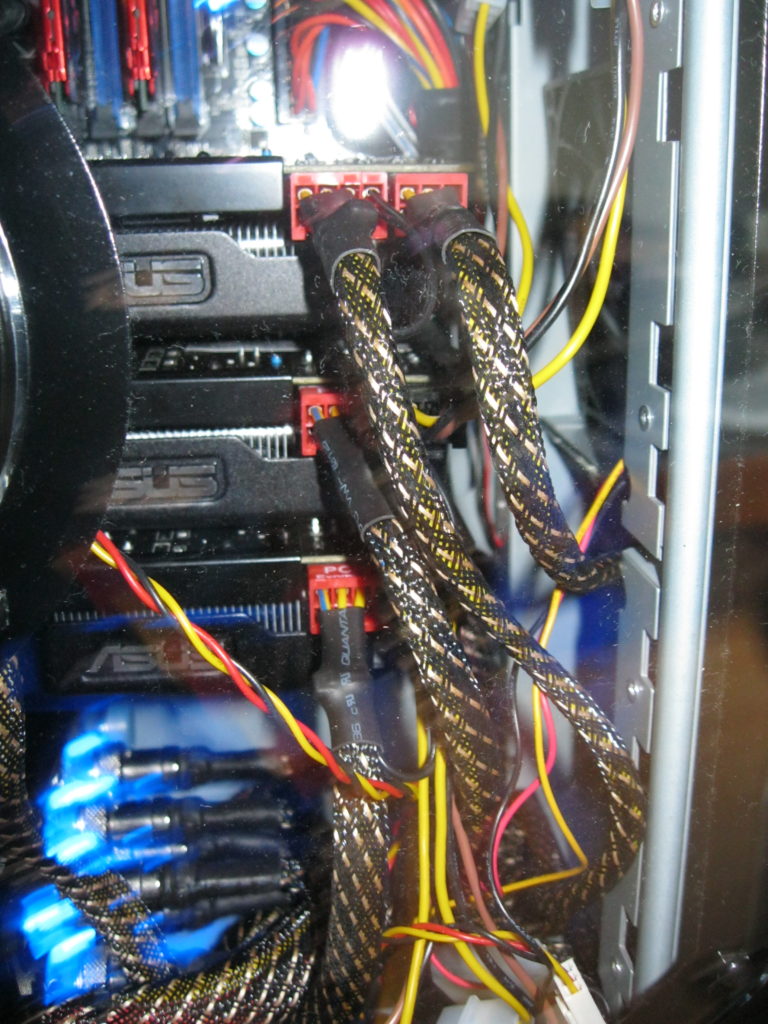
A common problem I have had with my GPUs, is that they are SO close together. Cramming 3 GPUs in a mid-tower case was not easy. There needs to be sufficient space between the cards so that the fans which are cooling the heat sinks have enough airflow. I used small pieces of thick rubber tubing to pry apart each card, so that I would have at least half and inch between each GPU.
7.5How can I change the Fan speed on my GPUs?
This depends on your operating system. Whether you are using Windows or Linux, you must have ATI Catalyst software installed. Please see section 11.2 for more info on how to obtain and install it.
If you are using Windows: Assuming already have the ATI Catalyst Control Center installed, you can look through the OverDrive™ settings, and adjust the fan speed of the cards. If noise is not an issue I reccomend 100% for maximum cooling.

If you are using linux: you can use the following commands to increase the speed of your fans. In the below example we will be setting the first available GPU in the machine to 100% fan speed:
DISPLAY=:0.0 aticonfig --pplib-cmd "set fanspeed 0 100"
Notice, that the first GPU is identified as: 0.0
If you wanted to run the same for the second and third card you can do so like this:
DISPLAY=:0.1 aticonfig --pplib-cmd "set fanspeed 0 100"
DISPLAY=:0.2 aticonfig --pplib-cmd "set fanspeed 0 100"
7.6How do I measure GPU temperatures?
In Windows: Measuring your GPU temperature is relatively easy. If you have ATI Catalyst installed (if not see section 11.2), you can check the GPU temperature by opening the ATI Catalyst software, and finding the OverDrive setting (Screenshot above). On that screen you will be able to see the temperature of the GPU usually measured in Celcius. Overclocking your GPU can affect the temperature, and is discussed in section 9.
Another way that I like to measure my GPU temperature in Windows 7 is through GPU Observer, which is a desktop gadget that you can download and display right on your desktop. It shows the temps, fan speed, and memory usage – very useful!

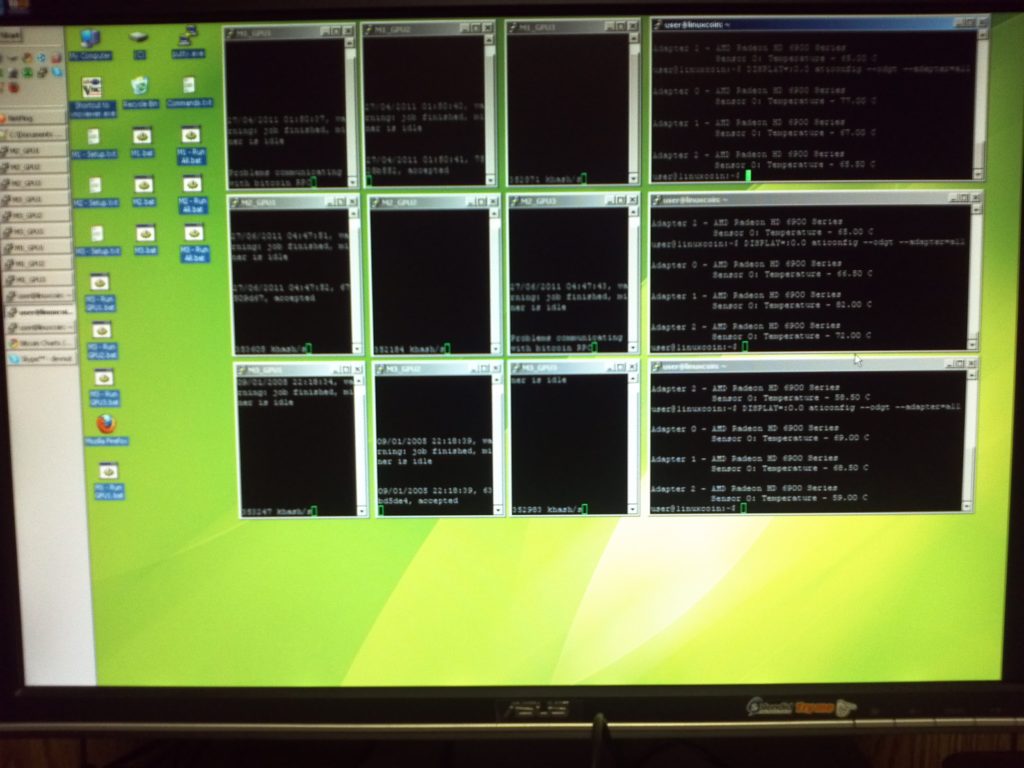
In linux: You can run the following command to get the temperature of all the GPUs in the system:
DISPLAY=:0.0 aticonfig --odgt --adapter=all
It will return results that look like this… (Look at the 3rd GPU Temps, 57.5°C – NOT BAD!! :cool:)

Power
8.1How much power will I need?
Of course, this question depends on how many machines / GPUs you plan on running. My machines currently have 3 GPUs installed, with a 1200 Watt power supply. Currently each machine at full load utilizes about 6 Amps, about 700 Watts, which is 0.7 KW (Kilowatts).
An average size residential circuit breaker is about 20 Amps. If you exceed 20 Amps of power on a 20 Amp circuit breaker, you will cause too much power to be drawn, and the circuit breaker will shut off to prevent damage or other failures. Therefore, it is important that you are aware of how much power is available on the circuit which your miners will be plugged into.
In my scenario, I originally only had about 20 Amps, and I needed to power 3 Machines. Although each machine was only using about 6 Amps a total of 18 Amps, the circuit breaker would still shut off periodically. Sometimes the Amp usage could jump for just a second, and it would be enough to trigger the circuit breaker to shut off. Due to this, I had to install additional circuit breakers, and fish some new lines to the room that was powering my Bitcoin Miners. You always want to leave a little overhead, and not max out the lines. Below are some pictures of the process in running new lines, leaving me at a total of about 80 Amps.
WARNING: If you are unsure how to install a new circuit breaker, or run your own electric lines please consult the assistance or services of a professional electrician! If you are capable of handling this yourself, here are some helpful links:


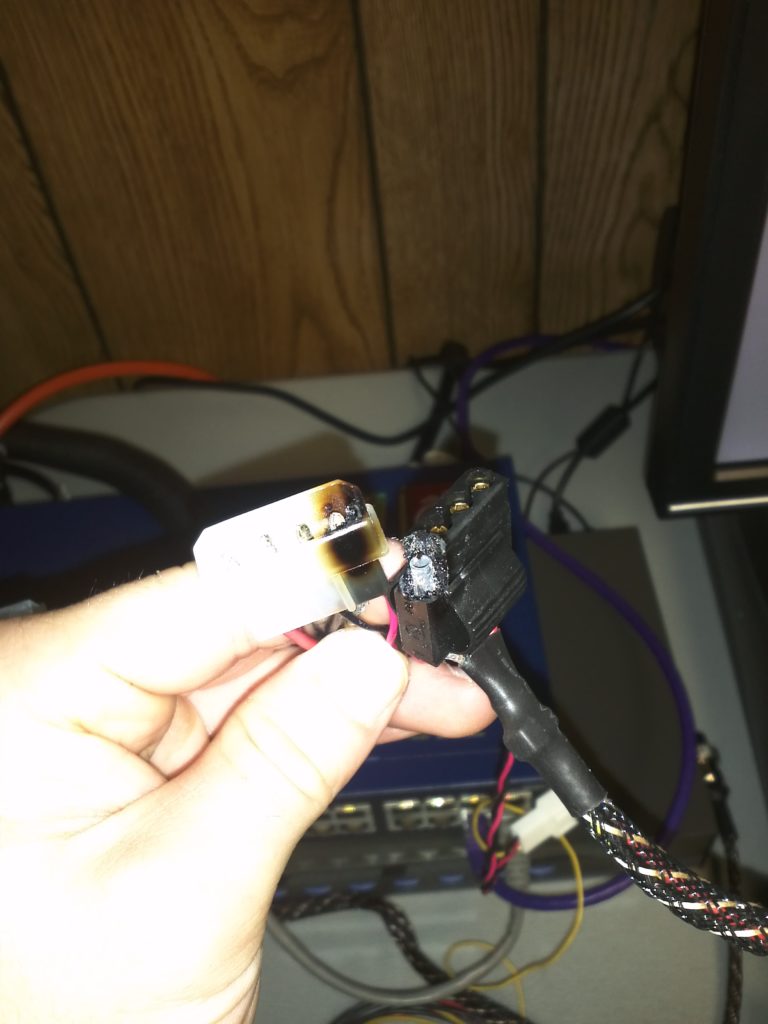
WARNING: Be sure that you evenly supply power to your GPUs! I made the mistake of running too many watts through a single wire supplied from the power supply. I had various other connections, including a molex splitter which was plugged in to other devices such as fans etc and eventually connecting to the GPU(s). Due to the fact that there was so much power draw through one wire, they quickly burned out, and could have caused serious damage or electrical fire. I would stay away from using any splitter connecters or thin wires when powering your GPUs. – I learned the hard way. Thankfully no serious damage occurred, just needed to replace the wires.
8.2How much will my power bill go up?
Your electric bill WILL increase.
In order to figure out how much you will be paying additionally for your electric bill each month we need to do some basic math.
Here’s what we need:
- How many watts each machine is using
- How much your energy provider charges for KWh (Kilowatt per hour)
- Duration of time that the machines are running.
We’ll use my setup as our scenario:
- Each machine uses 700 Watts
- My energy provider charges about $0.10 KWh (10 cents)
- My machines are running 24/7
Here is our math:
700 Watts × 24 hours × 30 days = 504,000 watt hours
Then we do 504,000 ÷ 1000 x $0.10 = $50.4
Since I have 3 machines I would do $50.4 × 3 = $151.2
Total monthly cost: $151.2
8.3How do I measure my power usage?
Measuring your power utilization is very easy. I purchased this handy gadget called the “Kill A Watt Electricity Load Meter and Monitor.” It costs $30 on newegg, here is a link http://www.newegg.com/Product/Product.aspx?Item=N82E16882715001. You can monitor Volts, Amps, Watts, Hz, and VA. There are various products like this one available, so find one that suites you.
That’s all you need to find out how much power resources each machine is using. Be sure to monitor the usage at full load.
Overclocking
9.1What is overclocking?
Overclocking is a term used when running a microprocessor faster than the speed for which it has been tested and approved. Overclocking is a popular technique for squeezing out a little more performance from a system. In many cases, you can force a GPU to run faster than it was intended. Overclocking does come with some risks, however, such as over-heating, so you should become familiar with all the pros and cons before you attempt it. Overclocking is also sometimes called speed margining.
Usually when overclocking you are adjusting the following settings:
- Clock Speed
- Memory usage
- Power (voltage)
- Fan Control
9.2Should I use overclocking?
I would say it is pretty safe to overclock any GPU at the right settings, you can certainly get more performance from your GPUs if you overclock.
My current mhash rate was 300 mhash/s by default. After overclocking my GPUs, I was able to get up to 352 mhash/s per GPU, and they run very stable…Not bad! This process took some trial an error to get the most out of my GPUs without the machine freezing up, but after a few hours of testing, here are my stats:
Default GPU Settings for ASUS ATI Radeon 6950
- Clock Speed: 810MHz
- Memory usage: 1250MHz
- Power (voltage): 110
- Fan Speed: 50%
Overclock Settings
- Clock Speed: 900MHz
- Memory usage: 800MHz
- Power (voltage): 110
- Fan Speed: 100%
You will notice, I increased the clock speed, which is the overall performance, but, I decreased the memory usage. The reason for this is that high memory usage does not provide any benefit in Bitcoin mining. By decreasing the amount of memory it will also help with suppressing the heat. Less heat = better. Also, you will notice I turned my fans up to 100%; this is discussed in section 7.5.
9.3How do I overclock my GPUs?
This depends on your operating system. Whether you are using Windows or Linux, you must have ATI Catalyst software installed. Please see section 11.2 for more info.
If you are using Windows: Assuming you already have the ATI Catalyst Control Center installed, you can look through the OverDrive™ settings, and adjust the performance settings. See the screenshot below:
If you are using linux: here is a great guide that explains how to overclock ATI cards linux by Melcar: http://www.overclock.net/linux-unix/517861-how-overclocking-ati-cards-linux.html. The same instructions are provided below:
I have adjusted the code with my overclock settings for the ATI Radeon HD 6900 series:
This is a small guide for overclocking your ATI card under Linux. This guide targets Ubuntu, but it should be the same for any distro.
Pre-requisites:
- Working fglrx driver
- Card supported by Overdrive (last time I checked only r6xx and up were supported, mobile and integrate chips excluded)
If you type the command aticonfig in a terminal, you will get several config. options that you can use with the driver, including Overdrive options; the proper synthax is aticonfig <option>. This is a list of Overdrive related options:
  --od-enable
        Enables Overdrive.

  --od-disable
        Disables Overdrive.  You need to restart X for clocks to go back to defaults.

  --odgc
        List your card's current core and memory clocks, the current peak clocks, and the range by which you can overclock (Overdrive locks are applicable).

  --odgt
        Gives out a core temperature reading.

  --odsc={NewCoreClock|0,NewMemoryClock|0}
        Specify desired clocks fore core and memory.

  --odcc
        Apply the new clocks specified by the setclocks command

  --odrd
        Restores default clocks.  You need to restart X for changes to take effect.
Steps for overclocking:
1. The first step obviously is to turn on Overdrive:
aticonfig --od-enable
If your card is not supported, you will get a message saying so.
2. Next we get the current clocks and the valid overclocking range for your card:
aticonfig --odgc

Default Adapter - ATI Radeon HD 6900 Series
                            Core (MHz)    Memory (MHz)
           Current Clocks :    810           1250
             Current Peak :    810           1250
  Configurable Peak Range : [500-950]     [1250-1350]
                 GPU load :    98%
3. Now we can specify valid frequencies for our overclock:
aticonfig --odsc=900,800

Default Adapter - ATI Radeon HD 6900 Series
                  New Core Peak   : 900
                  New Memory Peak : 800
4. Finally we apply the new frequencies:
aticonfig --odcc
5. Check your new overclock:
aticonfig --odgc

Default Adapter - ATI Radeon HD 6900 Series
                            Core (MHz)    Memory (MHz)
           Current Clocks :    900           800
             Current Peak :    900           800
  Configurable Peak Range : [500-950]     [1250-1350]
                 GPU load :    98%
You can also use Overdrive for Crossfire setups. The process is identical, with the difference that you need to specify the device being overclocked. Example:
aticonfig --list-adapters
#each card will be given a number that you append to the normal Overdrive commands
aticonfig --adapter=0 --odgc
#and so on...
Stress Testing
There is also a stress test available for Overdrive. For me this never works and I have yet to get an answer on this from any ATI dev. But you can try it and see if it works for you:
atiode -P 60 -H localhost:0; echo $?
#runs a stress test for 60 seconds; you can specify whatever time in seconds you want
After the test finishes it will spit out a number. Each number corresponds to a certain status:
0: Test successfully completed.
1: Invalid command-line parameters.
2: Test failed because of rendering errors.
3: Target adapter not found.
4: Test aborted due to unknown reason
Another way of stress testing is to run furmark. It works perfectly under WINE (just make sure you have Compiz off).
Other Tools:
If you don’t like the command line, there are also a pair of third party tools that you can use. Same pre-requisites still apply, since this are just frontends for Overdrive:
ATI Overclocking Utility
32bit
64bit


It’s pretty self explanatory. The latest version also has support for Crossfired cards.


Managing
10.1Using a node PC to oversee your Bitcoin miners
Currently, I have a dedicated windows machine onsite that I can connect to via, VNC, RDP, or Logmein. This machine is actually my primary node (connection point) for overseeing my Bitcoin mining rigs. It also is capable of monitoring the temperature in the room.
From this machine I can:
- Bootup, shutdown, restart, and check the status of all my Bitcoin miners
- Stop/Start mining software for all or individual GPUs
- See what speed and mhash/s rate they are running
- Monitor GPU temperatures
- Monitor clocks, memory, and voltage
- Adjust settings such as overclock, fan speeds, and various other scripts that power my Bitcoin miners.
All you need as far as software is Putty to connect to your miners via SSH, and a few bat scripts.
I think it is very important to have a central node where you can control and configure all these things, it makes it a lot easier to manage.
10.2How do I manage my Bitcoin rigs?
This is pretty broad question, but I’ll try to go over the basics of what I do to manage my Bitcoin mining rigs.
You want to check on your Bitcoin miners at least every few days to make sure everything is running smoothly. If you keep them close by (in your home), then it will probably be easier to monitor and manage them. My Bitcoin miners are not kept in my home, so I do my best to stop by the location at least once a week.
Physical check:
- Ensure all machines are running
- Ensure all fans are running
- Check room temperature
- Check GPU temperatures
Software check:
- Check Bitcoin proxy (discussed in section 13.1)
- Check Bitcoin pool accounts (discussed in section 12.1)
- Check Bitcoin markets
10.3Can I manage my Bitcoin miners remotely?
The simple answer is: Yes.
If you are using Windows: You can use the following protocols to login to your windows machines remotely to manage your Bitcoin miners: VNC, RDP, or Logmein.
If you are using Linux: You can use SSH (Command Terminal), or if you want a visual remote connection, take a look at this article: 7 of the best Linux remote desktop clients
Software
11.1What software can I use to run to mine for Bitcoins?
Here are my current choices for Windows and Linux mining:
For Windows: I like to use GUIMiner. Screenshot below.
For Linux: I like to use poclbm. Sorry, it’s command based, so no screenshot.
Below is a list of all the popular miners currently out there.
- GPU
- DiabloMiner – http://forum.bitcoin.org/index.php?topic=1721.0
- Support: Windows, Linux, OSX
- Features: Long Polling, BFI_INT
- poclbm – http://forum.bitcoin.org/index.php?topic=1334.0
- Support: Windows, Linux
- Features: Long Polling, BFI_INT
- hashkill – http://forum.bitcoin.org/index.php?topic=6819.0
- Support: Linux
- Features: Long Polling, BFI_INT, Auto Reconnect
- Phoenix – http://forum.bitcoin.org/index.php?topic=6458.0
- Support: Windows, Linux
- Features: Long Polling, BFI_INT, Auto Reconnect
- MeteorMiner – http://forum.bitcoin.org/index.php?topic=10353.0
- Support: Windows, Linux, OSX (Java Implementation)
- DiabloMiner – http://forum.bitcoin.org/index.php?topic=1721.0
- CPU
- Jgarzik – http://forum.bitcoin.org/index.php?topic=1925.0
- Support: Windows, Linux
- Features: ???
- Ufasoft – http://forum.bitcoin.org/index.php?topic=3486.0
- Support: Windows, Linux
- Features: Long Polling, Failover
- Jgarzik – http://forum.bitcoin.org/index.php?topic=1925.0
- FPGA
- FPGAminer – http://forum.bitcoin.org/index.php?topic=9047.0
- Support: Windows
- Features: N/A
- FPGAminer – http://forum.bitcoin.org/index.php?topic=9047.0
- Browser-Based
- BitJam – http://forum.bitcoin.org/index.php?topic=11549.0
- Support: Windows, Linux, OSX (Java Implementation)
- Features: Browser-based, Embed-able Java Applet
- KradMiner – http://forum.bitcoin.org/index.php?topic=9876.0
- Support: Windows
- Features: Firefox Browser-based OpenCL
- Bitp.it – http://forum.bitcoin.org/index.php?topic=9042.0
- Support: Javascript Browers
- Features: 100% Javascript
- BitcoinPlus.com – http://forum.bitcoin.org/index.php?topic=8780.0
- Support: Windows, Linux, OSX (Java Implementation)
- Features: Browser-based, Embed-able Java Applet
- BitJam – http://forum.bitcoin.org/index.php?topic=11549.0
- Front Ends
- GUIMiner – http://forum.bitcoin.org/index.php?topic=3878.0
- Support: Windows
- Features : poclbm, ufasoft, phoenix (phakt support)
- AOCLBF (Formerly Phoenix Rising) – http://forum.bitcoin.org/index.php?topic=10264.0
- Support: Windows
- Features: Phoenix (phakt support)
- Diablo and RPC for Mac – http://forum.bitcoin.org/index.php?topic=8994.0
- Support: OSX 10.6+
- Features: CLI Frontend Setup
- BitMiner – http://forum.bitcoin.org/index.php?topic=12135.0
- Support: Windows
- Features: poclbm, (Planned) Temp readings / usage
- GUIMiner – http://forum.bitcoin.org/index.php?topic=3878.0
11.2What is ATI Catalyst Control Center, and why do I need it?
The ATI Catalyst Control Center is a 3D acceleration control application that enables you to control the functionality of your graphics card. ATI Catalyst Control Center can be used to fine-tune your graphic settings, enable or disable connected display devices, and change the orientation of your desktop, etc. Many features present you with a preview of your changes before they are applied.
The ATI Catalyst Control Center generally comes with graphics driver for ATI graphics card and south bridge driver for ATI chipset (if you have an ATI chipset on your motherboard). The main advantages of ATI drivers and Tools are their universal compatibility with any ATI graphics card or motherboard. So, the single software you download for your use can be is only necessary to run any other ATI graphics card (inbuilt or external, PCI or AGP, whatever).
Downloading ATI Catalyst software for your operating system:
If you are using Windows: The appropriate ATI Catalyst Control Center version usually comes with your graphics card, so you may want to check with your vender for a specific version. OR You can also download this online here: http://sites.amd.com/us/game/downloads/Pages/downloads.aspx.
If you are using Linux: The ATI Catalyst Display Driver can be found here: http://support.amd.com/us/gpudownload/linux/Pages/radeon_linux.aspx. You can use the following guide on to install it on Ubuntu 10.10: http://forum.bitcoin.org/?topic=3356.msg47489#msg47489, unfortunately this guide is not verified to work on later versions of Ubuntu or Debian, so you will need to Google around for a guide to help you with that. You can also use your package manager to search and install the latest software.
11.3What operating systems can I mine for Bitcoins?
You can use both Windows and Linux. Personally, I prefer Linux.
I highly recommend using LinuxCoin. It is a small Debian Wheezy based OS created just for the bitcoin community. Linuxcoin has been designed with the average user in mind and everything is super simple to start using / mining bitcoins. Everything is pre-installed and is ready to go. It saves a lot of work and headache, this is what I use. Best of all, it can be run directly off a USB flash drive! Which answers our next question…
Get more info here: http://forum.bitcoin.org/?topic=7374.0 Or you can visit the official site here: http://www.linuxcoin.co.uk/
11.4Can I run a Bitcoin miner from a USB flash drive?
YES! Use LinuxCoin, please read the section above!
11.5Automation and batch scripts
My friend Brandon and I put together a very nice automated script that sets up our entire bitcoin mining environment. It creates various files and utilities that we’ll need to run, overclock, and monitor our Bitcoin miners.
Please note: This code has only been used / tested on LinuxCoin!
This script does the following (Scroll down to see the “Setup” script):
- Disables Screen Saver
- Enables AMD Registration
- Creates gpuminer.sh config files for each indivdual GPU worker
- Creates startgpu.sh files for each GPU and use settings from the gpuminer.sh
- Creates mine.sh files which use screen to execute the startgpu.sh
- Creates maxfans.sh, which boosts all the GPU fans to 100%
- Creates startallgpus.sh, which can be used to start all GPUs
- Creates gettemps.sh, which can be used to retrieve the temperature from all GPUs
- Creates overdrive_profile.ovr, which sets up the overclock settings
- Creates setclocks.sh, which actually applies the overclock settings
- After it creates all the files, it sets the proper permissions on files
- Lastly, it installs screen, and then runs setclocks.sh
You WILL need to customize this script for your needs!
This code has been setup to use 3 GPUs. You will notice reference to GPU1, GPU2, and GPU3. This is what you’ll need to customize:
- GPU Count: If you have more or less GPUs, you will need to adjust this script.
- Username/Password/Pool/Port: You will need to change the username, password, mining pool, and possible the port (-p).
- Clock Settings: These clock settings are optimized for the ATI Radeon HD 6950 GPU. If you do not have this card, you will probably need to adjust your clock settings to the appropriate frequencies.
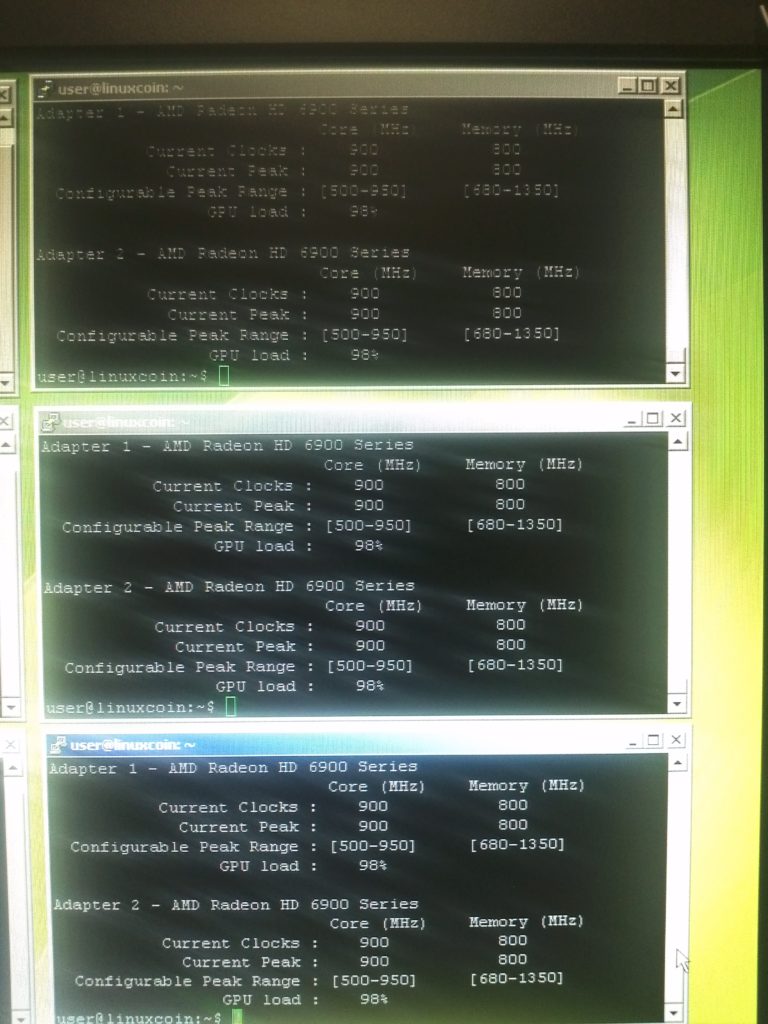
I use a Windows machine to execute / monitor all my bitcoin miners. Looks like the following:
I use Putty to configure SSH profiles for each bitcoin miner GPU, and then I use a .bat file to launch which bitcoin miners I want. The .bat file will run putty, automatically login to the bitcoin mining rig, and launch our command to start running the miner.
First I setup a Putty session for each GPU per machine. For example, M1_GPU1, M1_GPU2, M1_GPU3. Each one of them point to my first Bitcoin mining rig identified as M1. The IP address of M1 is: 192.168.1.4
Next, I go to the “SSH” menu item on the left, and I tell putty a command to execute upon login. You will see I input: /home/user/mine1.sh. I will set this accordingly to each GPU, so the second one would simply be: /home/user/mine2.sh, and the third woudl be: /home/user/mine3.sh. This command will actually execute out bitcoin miners to run.
Then, I go to the “Behavior” menu item on the left, and I give each one their appropriate name. This way, when each GPU terminal windows pops up, it has the appropriate title in the title bar so I can identify it.
Lastly, I go to the “Window” menu item on the left, and I specify the amount of columns and rows, so when the GPU terminal window opens, it will be in nice little square like you see in the screenshot above.
When we are all done with Putty, I create a .bat file with the following code. This code actually runs putty.exe, then it identifies the profiles we just created in putty, and automatically logs in to the SSH session using the username “user” and the password “live” (default login with LinuxCoin).
However, remember the /home/user/mine1.sh, we put into the “SSH” menu? When this putty runs, and uses the profile we created, it will automatically run that command, upon login. That THAT is what executes each GPU miner!
Code for our .bat file:
start /SEPARATE putty.exe -load "M1_GPU1" -l user -pw "live"
start /SEPARATE putty.exe -load "M1_GPU2" -l user -pw "live"
start /SEPARATE putty.exe -load "M1_GPU3" -l user -pw "live"
Create setup script file on linux
To use this code, you will need to create a file on Linux and copy and paste the contents inside. Save it as a .sh file, for example setup.sh. Then you can execute this file by running:
sudo sh setup.sh
Here is the setup script
#!/bin/bash

# Disable Screen Saver ---------------------------------------
setterm -blank 0
DISPLAY=:0.0 xset -dpms
DISPLAY=:0.0 xset s 0
sudo killall xscreensaver

# Enable AMD Registration ---------------------------------------
cd /opt/AMD-APP-SDK-v2.4-lnx64
sudo tar xvfz icd-registration.tgz -C /

cd /home/user/
sudo chmod -R 777 /opt
mkdir /home/user/miners/

# Setup Mining Configs---------------------------------------

cat > /home/user/miners/gpu1miner.sh << EOF
#!/bin/bash
export DISPLAY=:0.0
cd /opt/miners/poclbm/;DISPLAY=:0.0 python poclbm.py --user=GPU1 --pass=password --device=0 -o yourbitcoinpool.com -a 5 -p 80 -v -w 128 -f 25
EOF

cat > /home/user/miners/gpu2miner.sh << EOF
#!/bin/bash
export DISPLAY=:0.1
cd /opt/miners/poclbm/;DISPLAY=:0.1 python poclbm.py --user=GPU2 --pass=password --device=1 -o yourbitcoinpool.com -a 5 -p 80 -v -w 128 -f 25
EOF

cat > /home/user/miners/gpu3miner.sh << EOF
#!/bin/bash
export DISPLAY=:0.2
cd /opt/miners/poclbm/;DISPLAY=:0.2 python poclbm.py --user=GPU3 --pass=password --device=2 -o yourbitcoinpool.com -a 5 -p 80 -v -w 128 -f 25
EOF

# Run Individual GPU's---------------------------------------

cat > /home/user/startgpu1.sh << EOF
#!/bin/bash
export DISPLAY=:0.0
sh /home/user/miners/gpu1miner.sh
EOF

cat > /home/user/startgpu2.sh << EOF
#!/bin/bash
export DISPLAY=:0.1
sh /home/user/miners/gpu2miner.sh
EOF

cat > /home/user/startgpu3.sh << EOF
#!/bin/bash
export DISPLAY=:0.2
sh /home/user/miners/gpu3miner.sh
EOF

# Define Mine Files---------------------------------------

cat > /home/user/mine1.sh << EOF
#!/bin/bash
screen -s GPU1 -t M1_GPU1 /home/user/startgpu1.sh
EOF

cat > /home/user/mine2.sh << EOF
#!/bin/bash
screen -s GPU2 -t M1_GPU2 /home/user/startgpu2.sh
EOF

cat > /home/user/mine3.sh << EOF
#!/bin/bash
screen -s GPU3 -t M1_GPU3 /home/user/startgpu3.sh
EOF

# Set Fans to 100% ---------------------------------------

cat > /home/user/maxfans.sh << EOF
#!/bin/bash
DISPLAY=:0.0 aticonfig --pplib-cmd "set fanspeed 0 100"
DISPLAY=:0.1 aticonfig --pplib-cmd "set fanspeed 0 100"
DISPLAY=:0.2 aticonfig --pplib-cmd "set fanspeed 0 100"
EOF

# Start all GPUs ---------------------------------------
cat > /home/user/startallgpus.sh << EOF
screen -dmS GPU1 /home/user/startgpu1.sh &
screen -dmS GPU2 /home/user/startgpu2.sh &
screen -dmS GPU3 /home/user/startgpu3.sh &
EOF

# Get Temperature ---------------------------------------

cat > /home/user/gettemps.sh << EOF
echo "GPU1";
DISPLAY=:0.0 aticonfig --pplib-cmd "get temperature 0"
echo "GPU2";
DISPLAY=:0.1 aticonfig --pplib-cmd "get temperature 0"
echo "GPU3";
DISPLAY=:0.2 aticonfig --pplib-cmd "get temperature 0"
EOF

# Set GPU Clocks (Mhz,Memory,Voltage)---------------------------------------

cat > /home/user/overdrive_profile.ovr << EOF
<?xml version="1.0" encoding="utf-8"?>
<OVERDRIVE_PROFILE>
  <PERFORMANCE_LEVEL level="2" gpu="88000" mem="80000" voltage="1100"/>
  <PERFORMANCE_LEVEL level="1" gpu="50000" mem="68000" voltage="1100"/>
  <PERFORMANCE_LEVEL level="0" gpu="25000" mem="15000" voltage="900"/>
  <FAN_SETTING percentage="100"/>
  <FAN_CTRL enabled="no"/>
  <FAN_CTRL_CURVE type="0"/>
  <FAN_CTRL_POINT nr="0" temperature="2000" percentage="0"/>
  <FAN_CTRL_POINT nr="1" temperature="4000" percentage="2500"/>
  <FAN_CTRL_POINT nr="2" temperature="6000" percentage="5000"/>
  <FAN_CTRL_POINT nr="3" temperature="8000" percentage="7500"/>
  <FAN_CTRL_POINT nr="4" temperature="10000" percentage="10000"/>
  <MONITOR_SAMPLE_TIME interval="10"/>
  <COLOR_PROFILE enabled="no" longitude="-13.000000" latitude="52.000000" color_temp_day="0" color_temp_night="0" transition="30"/>
</OVERDRIVE_PROFILE>
EOF

cat > /home/user/setclocks.sh << EOF
DISPLAY=:0.0 AMDOverdriveCtrl -b -a -i 0 overdrive_profile.ovr
DISPLAY=:0.1 AMDOverdriveCtrl -b -a -i 6 overdrive_profile.ovr
DISPLAY=:0.2 AMDOverdriveCtrl -b -a -i 12 overdrive_profile.ovr
EOF

# Set File Permissions ---------------------------------------
chmod +x /home/user/setclocks.sh
chmod +x /home/user/gettemps.sh
chmod +x /home/user/startallgpus.sh
chmod +x /home/user/maxfans.sh
chmod +x /home/user/miners/gpu1miner.sh
chmod +x /home/user/miners/gpu2miner.sh
chmod +x /home/user/miners/gpu3miner.sh
chmod +x /home/user/startgpu1.sh
chmod +x /home/user/startgpu2.sh
chmod +x /home/user/startgpu3.sh
chmod +x /home/user/mine1.sh
chmod +x /home/user/mine2.sh
chmod +x /home/user/mine3.sh

# Install Screen ---------------------------------------
sudo apt-get update;sudo apt-get install screen

# Run Set Clocks ---------------------------------------
sh /home/user/setclocks.sh
Bitcoin Mining Pools
12.1What are Bitcoin mining pools (Pool Mining)?
Pooled mining is an approach where multiple generating clients contribute to the generation of a block, and then split the block reward according the contributed processing power. Pooled mining effectively reduces the granularity of the block generation reward, spreading it out more smoothly over time.
Pooled mining “pools” all of the resources of the clients in that pool to generate the solution to a given block. When the pool solves a block, the 50 BTC generated by that block’s solution is split and distributed between the pools participants.
Solo mining is when a miner performs the mining operations alone without joining a pool. All mined blocks are generated to the miner’s credit.
Pros/ConsPool Mining Pros
- Pooled mining generates a steadier income.
- Pooled mining can generate a 1-2% higher income (before fees, if any) due to long polling provided by the pools.
Pool Mining Cons
- Pool mining can suffer interruptions from outages at the pool provider.Pools are subject to DOS attacks and have other downtimes, too. Backup pools and solo mining can be configured for these cases.
- Pooled mining tends to generate a smaller income due to fees being charged and transaction fees not being cashed out.There are zero fee pools. Until now, transaction fees are not cashed out by any pool.
- Pools might be part of attack scenarios.
Solo Mining Pros
- Solo mining is less prone to outages resulting in higher uptime.
- Solo mining doesn’t incur any fees. For each discovered block, 50 BTC and the transaction fees are paid to the miner.
Solo Mining Cons
- Solo mining tends to generate more erratic income.
- Solo mining wastes time due to only supporting getwork pull.
See Also
- Why pooled mining An article in favor of pooled mining.
12.2What are the benefits of using a Bitcoin mining pool?
With increasing generation difficulty, mining with lower-performance devices can take a very long time before block generation, on average. For example, with a mining speed of 1000 Khps, at a difficulty of 14484 (which was in effect at the end of December, 2010), the average time to generate a block is almost 2 years.
To provide a more smooth incentive to lower-performance miners, several pooled miners, using different approaches, have been created. With a mining pool, a lot of different people contribute to generating a block, and the reward is then split among them according to their processing contribution. This way, instead of waiting for years to generate 50btc in a block, a smaller miner may get a fraction of a bitcoin on a more regular basis.
A share is awarded by the mining pool to the clients who present a valid proof of work of the same type as the proof of work that is used for creating blocks, but of lesser complexity, so that it requires less time on average to generate.
Get all the details here: https://en.bitcoin.it/wiki/Why_pooled_mining
12.3Different types and rewards of mining pools
Reward types and explanation:
PPS – Pay Per Share. Each submitted share is worth certain amount of BTC. Since finding a block requires shares on average, a PPS method with 0% fee would be 50 BTC divided by . It is risky for pool operators, hence the fee is highest.
SMPPS – Shared Maximum Pay Per Share. Like Pay Per Share, but never pays more than the pool earns. [1]
ESMPPS – Equalized Shared Maximum Pay Per Share. Like SMPPS, but equalizes payments fairly among all those who are owed. [2]
Prop. – Proportional. When block is found, the reward is distributed among all workers proportionally to how much shares each of them has found.
PPLNS – Pay Per Last N Shares. Similar to proportional, but instead of looking at the number of shares in the round, instead looks at the last N shares, regardless of round boundaries.
Score – Score based system: a proportional reward, but weighed by time submitted. Each submitted share is worth more in the function of time t since start of current round. For each share score is updated by: score += exp(t/C). This makes later shares worth much more than earlier shares, thus the miner’s score quickly diminishes when they stop mining on the pool. Rewards are calculated proportionally to scores (and not to shares). (at slush’s pool C=300 seconds, and every hour scores are normalized)
See details here: https://en.bitcoin.it/wiki/Comparison_of_mining_pools
12.4Comparison of mining pools?
Personally, I use Bitcoin Pooled Mining (Slush), and Bitcoins.lc. See the rest below and check out this link for details: https://en.bitcoin.it/wiki/Comparison_of_mining_pools
(Sorry, I know this table goes off the page! :()
| Name | Location | GHash/sec | Reward Type | Transfees | Fee PPS | Fee Prop/Score | Audits | Protocol | Launched | Forum | Link |
|---|---|---|---|---|---|---|---|---|---|---|---|
| DeepBit | Germany | 4180 | PPS / Prop. | kept by pool | 10% | 3% | ? | RPC (+LP) | 2011-02-26 | Link | Link |
| BTC Guild | USA, EU | 2800 | Prop. | kept by pool | 0% | ? | RPC (+LP) | 2011-05-09 | Link | Link | |
| Bitcoin Pooled Mining (Slush) | London | 1491 | Score | kept by pool | 2% | ? | RPC | 2010-11-27 | Link | Link | |
| Bitcoins.lc | EU | 624 | Prop. | kept by pool | 0% | ? | RPC (+LP) | 2011-05-27 | Link | Link | |
| Eligius | Germany | 500 | SMPPS | kept by pool | 0.000001% | Yes | RPC (+LP) | 2011-04-27 | Link | Link | |
| BTCMine | UK | 480 | Score | kept by pool | 2% | ? | RPC (+LP) | 2011-03-11 | Link | Link | |
| ArsBitcoin | USA | 300 | SMPPS | kept by pool | 0% | ? | RPC (+LP) | 2011-06-15 | Link | Link | |
| Bitcoin Mining Pool | USA | 272 | Prop. | kept by pool | 0% | ? | RPC (+LP) | Unknown | Link | Link | |
| Mining Team Reddit (MtRed) | USA, EU | 212 | Prop | kept by pool | 0% | ? | RPC (+LP) | 2011-05-25 | 1 2 | Link | |
| Mineco.in | UK | 170 | PPLNS | Shared | 0% | ? | RPC (+LP) | 2011-06-15 | Link | Link | |
| PolMine | Poland | 150 | Prop. | kept by pool | 0% | ? | RPC (+LP) | 2011-06-13 | Link | Link | |
| Bitp.it | USA | 100 | ESMPPS | kept by pool | 0% | ? | RPC (+LP) | 2011-06-08 | Link | Link | |
| x8s | Germany | 95 | Prop | kept by pool | 1% | ? | RPC (+LP) | 2011-06-08 | Link | Link | |
| BitClockers | USA, EU | 80 | Prop. | kept by pool | 2% | ? | RPC (+LP) | 2011-05-27 | Link | Link | |
| Eclipse Mining Consortium | USA / Europe / AU / Asia | 50 | Prop / Score | kept by pool | 0% | ? | RPC (+LP) | 2011-06-14 | Link | Link | |
| NoFeeMining | USA | 48 | Prop | Shared | 0% | ? | RPC (+LP) | 2011-06-17 | Link | Link | |
| PoolMunity | France | 45 | Score | kept by pool | 1.5% | ? | RPC (+LP) | 2011-07-24 | Link | Link | |
| Triplemining | Europe | 45 | Prop | kept by pool | 1% | Yes | RPC (+LP) | 2011-06-28 | Link | Link | |
| Ozco.in | AUS | 41 | Prop | kept by pool | 1% | ? | RPC (+LP) | 2011-06-08 | Link | Link | |
| rfcpool | UK | 29 | Prop & PPS | kept by pool | 7% | 0% | ? | RPC (+LP) | 2011-07-05 | Link | Link |
| Btcworld.de | Germany | 28 | Prop | kept by pool | ? | ? | RPC (+LP) | 2011-06-18 | Link | ||
| btcmp.com | Germany | 27 | Prop | kept by pool | 0% | ? | RPC (+LP) | 2011-06-28 | Link | ||
| Continuum | Canada | 16 | Score | kept by pool | 0% | ? | RPC (+LP) | 2011-05-17 | Link | Link | |
| Swepool | Sweden | 13 | Prop | kept by pool | 0% | ? | RPC (+LP) | 2011-05-14 | Link | Link | |
| CHWpool | Chile | 10 | Prop | kept by pool | 1% | ? | RPC (+LP) | 2011-06-30 | Link | ||
| BitMinter | USA | 10 | Prop | kept by pool | 0% | Yes | RPC (+LP) | 2011-06-18 | Link | Link | |
| Betcoin.co Pool | USA | 10 | PPLNS | kept by pool | 0% | ? | RPC (+LP) | 2011-07-07 | Link | Link | |
| Bitcoinitalia | Italy | 4.5 | Prop. | kept by pool | 0% | ? | RPC (+LP) | 2011-07-12 | Link | Link | |
| BTCSERV.net | Germany | 3 | Prop | kept by pool | 0% | ? | RPC (+LP) | 2011-07-09 | Link | Link | |
| bestbitcoinminingpool | Australia | 3 | Prop. | kept by pool | 0% | ? | RPC (+LP) | 2011-07-01 | [4] | Link | |
| UnitedMiners | US | 3 | Prop | kept by pool | 3% | No | RPC (+LP) | 2011-06-28 | Link | Link | |
| 21bitcoin | CN, HK | 2 | Prop. | kept by pool | 0% | ? | RPC (+LP) | 2011-06-20 | [3] | Link | |
| P2Pool | n/a (P2P) | 2 | Prop | ? | 0.5% | ? | RPC (+LP) | 2011-06-17 | Link | Link | |
| Coinotron | Poland | 2 | Score | kept by pool | 0% | ? | RPC (+LP) | 2011-07-06 | Link | Link | |
| Simplecoin | Unknown | 1.4 | Prop | kept by pool | 0% | ? | RPC (+LP) | 2011-06-02 | Link | Link | |
| BitLotto Pool | Los Angeles | 1 | Prop | kept by pool | ? | RPC (+LP) | 2011-06-08 | Link | Link | ||
| ZA Bitcoin | South Africa | 0.4 | Score | kept by pool | 0% | ? | RPC (+LP) | 2011-06-14 | Link | Link |
Bitcoin Proxy
13.1What is a Bitcoin mining proxy?
A bitcoin mining proxy is a a multi-pool, multi-worker proxy for Bitcoin miners, supporting long polling and pool failover. This software allows multiple miners to be run against multiple pools with fail-over to other pools if something happens to a miner’s preferred pool. It requires a web server supporting PHP, and a MySQL database.
Here is a link to what seems to be the only good available Bitcoin Mining Proxy: https://github.com/cdhowie/Bitcoin-mining-proxy
13.2What are the benefits of using a Bitcoin mining proxy?
Failover: If one pool fails, it can automatically switch to another pool.
Centralization: Keeps all your bitcoin miner workers and pools centralized.
One time login setup: You only need to setup your worker logins one time.
Pool toggling: You can switch, enable, or disable a pool at any given time.
Monitoring: Easily monitor live stats, and mhash rates of your miners.
